


Growing registry size is often the culprit behind the poor performance of an OS. Thankfully, wiping it up is now a simple, few minutes job. Find out how to rid your system of it!
Is your PC too slow to help you work as usual? You can always expect your computer’s unusually grown or increasing registry to hamper the performance of your otherwise fine operating system!
Yes, as your system’s registry grows in volume, your computer becomes slower day by day. In that case, cleaning registry manually is the only way out. You can’t rely on third-party registry cleaners as they often use a predefined set of tricks or rules that your registry might not support.
Here is a step-wise guide to manually cleaning your computer’s registry:
What It Means to Clean a Computer’s Registry
Manual cleaning of a computer’s registry refers to the removal of all application entries that exist in the form of leftover items after uninstalls, data removal, spammy program installation, etc. To perform and complete the process correctly, however, you need to be an experienced Windows user. While it is quite a simple process, any off-beam commands could damage your system further!
How to Clean Computer Registry?
It is very easy to clean your computer registry. Even if it takes a little technical knowledge, if you follow our guide carefully, it is a few minutes job. You don’t have to worry about getting into trouble if you carefully follow these steps. So, here is how to clean computer registry.
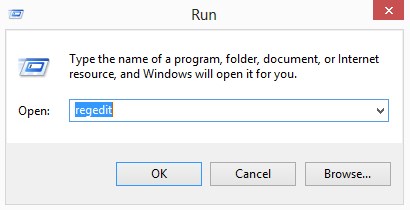
1. Opening the Windows Registry Editor
- Click on the Start button and select Run to open a text box (or simply press Win+R keys.)
- Type ‘regedit’ in the text box and press Enter or you can also click on OK

2. Backing up Your Current Registry
Before you make any changes, consider backing your current registry up. This will enable you to undo all the changes in case they begin to harm your installed software or the entire operating system in any manner. You should undertake the backup registry process well before starting to edit your registry since it is a critical, time-consuming process.
- Click on File and select Export. Go to the Export Range panel and select All.
- Select a location to keep the backup and enter a name. Click on Save.

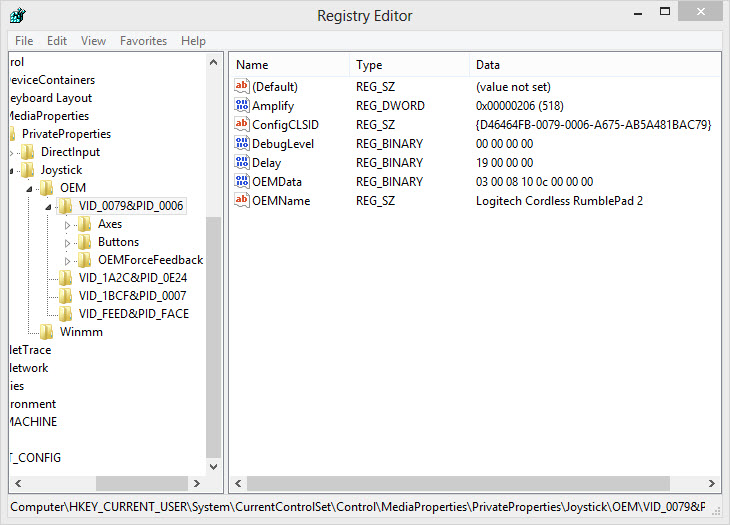
3. Browsing to Remove Older Applications
Remove all application listing that has been uninstalled earlier. Enlarge the “’HKEY_CURRENT_USER’ key by hitting the plus sign. Expand the Software key and highlight another some other key for the application. Press Delete to delete it.
4. Searching Applications by Name
To remove application listings that have been uninstalled, give Ctrl+f command that will open a dialogue box. Search for application listings using names. Delete all highlighted values or keys.
5. Removing Useless Start-Up Items
All major applications such as Real Player or Adobe Reader will install registry values while loading and you’ll have to delete them.
- Expand keys and reach different location – My Computer > HKEY_LOCAL_MACHINE > SOFTWARE > Microsoft > Windows > Current Version.
- Select Run and search for values in the right panel. Keep highlighting values as you remove them. Repeat the same process for the ‘HKEY_CURRENT_USER’ location too.
- When you are done, close the registry editor.