


Creating professional videos to entertain or educate others is not an easy task. No one likes videos that are low-quality, don’t entertain them, and most importantly, poorly edited. You can add as much info as you want in an educational video, and still get backlashes for its quality and editing. A professional video editor will not face these issues because of several reasons such as their experience in the field, advanced video editing tools, and their production budget.
But not everyone has access to these resources or time to learn these advanced tools. That’s where the significance of a beginner-friendly video editing tool comes in. Instead of spending months learning the advanced aspect of video editing software, or spending thousands on producing quality videos, all you need is such a great tool that can get the job done within minutes with minimum effort. Today we are going to introduce you to such a tool, Wondershare Filmora X.
What is Wondershare Filmora X?
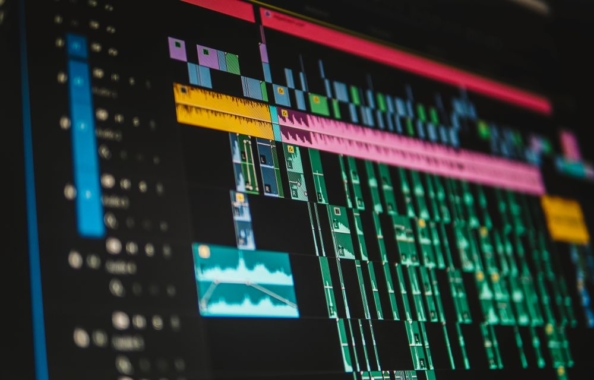
Wondershare Fimora X is the latest version in the Filmora series. The software simply makes it way too easy for anyone to create professional videos with an easy drag-and-drop interface. Just drag the source files to the interface, cut, edit, or split them, add effects with the green screen, do anything you want to the video. That’s what you get with Wondershare Filmora. The advanced additions such as keyframing, motion tracking, split-screen, etc. sweeten the features even further.
In addition to these features, Filmora also provides some exclusive functions for Mac users. Auto Reframe, M1 chip & touch bar support, direct import from Photos Library are just a few of them. Supporting different formats to be compatible with different operating systems, you will never have to settle with one. Files edited using Filmora will be accessible from both macOS (including macOS 11 and Apple M1 ARM-based processor) and Windows.
Before Starting to Edit
Before you start editing videos, there are few things you should know. Producing quality videos is not possible with just a good video editor.
- Never settle on a single shot: Always make sure that you have multiple shots of the same scene so that you can choose the best one out of them. If you do not do that and figure out some flaws in a scene, you will have to go through the process all over again.
- Always watch the videos: To make the editing process easier and as fast as possible, it is always a good idea to watch the entire clips you have in hand. That way you will know where to start and where to end or which clip to use in a certain place.
- Take backups: Just like any other files or important documents, if you really care about your videos, you should have a backup of them somewhere else. Accidents can always happen and you might end up losing your hard work. Whether it is an accidental deletion or you edited the original video files without copying them, things can go wrong. So take backups now.
Making a Professional Video using Filmora X
Creating professional videos is not the easiest job you can do on a computer. Especially on Mac operating system, the options you have are very limited. After using Filmora for editing numerous videos and trying out the new Filmora X, we can definitely say that it is one of the best video editor software for Mac users on the market. Let’s see how can we produce a professional video using it.
- Launch Filmora.
- Select the Aspect Ratio (the default option of 16:9 will work perfectly for most of the videos).
- Click on New Project.
- Now, let the editor load all its content. Be patient.
- If you haven’t registered Filmora yet, do that by clicking on the Register button.
- Now, we can adjust some settings by navigating to File > Project Settings. Here you can set the options such as Resolution, Aspect Ratio, Frame Rate, etc. So, set them based on your preferences.
- Import media files using the upper left corner option. You can choose an array of ways to import files from anywhere on your computer, phone, social media, etc.
- You can see all the imported media files in the Filmora Media tab. You may also create folders and organize the files to make it easier to find them.
- Drag and drop media files you want to edit to the timeline at the bottom. Just like any other editor, you can preview, cut, split, delete, and do almost anything you want with the media file. Unlike many other video editors, it is extremely easy to edit the clips. For example, to trim a video, all you have to do is dragging the ends of the video files.
- Add visual effects/transitions/elements to the edited clips using the icons at the top of the window. It is pretty easy to find. Just click on the visual effects or transitions icon and choose the desired effects or transitions you want to apply. You can also add additional elements or titles to the videos wherever you want using the respective icons at the top.
- Colour correct the video using the advanced colour correction tools on the software. Simply double-click on the video. It will bring up the video editing screen. Going to the Color tab will allow you to adjust different colour aspects of the video. It will take time to master the trick.
- Export the video once you are done with it using the Export button on the top of the screen. Choose a video file format of your choice and optimize it for the device you are making the video for (or your preference). There are also options to directly upload the video files to YouTube, Facebook, or Vimeo making it suitable for video creators.
- That’s all, now you have a professional video created within a few minutes and very minimal effort.
Features of the Tool
Wondershare Filmora X comes with a lot of features useful for different video editing requirements. Here are some of them in case you are interested in knowing more about the software before giving it a try.
Auto Reframe – Exclusive Feature for Mac Users
Do you want to automatically crop a focal point in any video? You do not have to manually do that anymore. This feature is coming with the latest Filmora X which you can start using today to save a lot of time cropping videos.
Motion Tracking
The latest version of the Filmora is coming with the motion tracking feature that will help you to attach an element to a moving object. The auto motion tracking feature will automatically capture the movement of the object helping you to accomplish various video editing needs that depends on the object motion.
Keyframing
Just like any advanced video editing software, Wondershare Filmora has a keyframing feature that can be used to add keyframes to change the position, rotation, scale, and opacity of a clip and animation. Keyframing mac videos has never been easy.
Auto Ducking
We all face situations where the music prevents the actual audio from standing out. Even if we have such a low-quality audio file, the audio ducking feature can be used to easily fade the music and make the dialogues stand out from the audio file. A very rare feature that most of the video editing tools missed.
Dark/Light Mode
Not everyone likes light mode, and not everyone likes dark mode. Some people prefer to work in the dark mode at night to reduce eye strain. But some people find it horrible to work with. Whatever the case is, the software is coming with both dark and light modes which you can choose from. Switching the UI style is a single click away.
Split Screen Templates
With the addition of a new refreshed set of templates including split-screen templates in different proportions, you can simplify the process of creating videos for your social media accounts like Instagram or Facebook in different video sizes. If you are a social media creator, the software makes video editing in mac extremely easy.
HEVC Codec Support
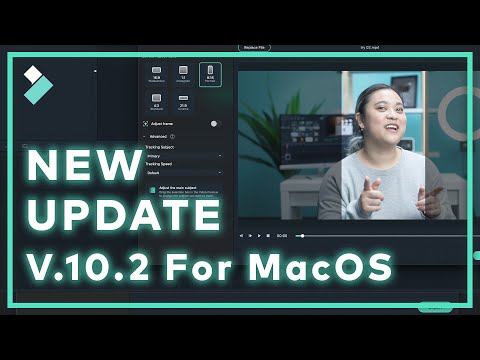
iOS users might be familiar with the HEVC format. It is one of the most popular formats for videos on iPhones and iPads. Now you can losslessly cut HEVC video files on your Mac version of Filmora. The feature is available from Filmora v10.2
Direct Import from Photos Library
With the latest version of Filmora, you can now directly import files from your photos library. It is easier than ever. You can simply import all the resources you need to create a professional video and stitch them together to craft the perfect video.
Conclusion
Now you know everything you wanted to know to create a professional video using Wondershare Filmora X. If you do not want to break a sweat trying to edit and cut videos, add effects to them, output lossless quality, this is the way to choose. Especially with the help of the new Mac Touchbar, editing videos was never been easier. Filmora is extremely easy to use, outputs quality videos without any loss in the process, is free to try, so why not give it a shot?