

Google fonts offer a great collection of open source fonts. Google recently launched a feature to download fonts directly on Desktop. Designers, Webmasters collect these types of fonts in projects. After downloading you can use the fonts on any desktop publishing software such as Photoshop, MS Office, etc. You can download Google fonts simply by using this process. Google currently have 600+ web fonts in its service.

Steps to follow
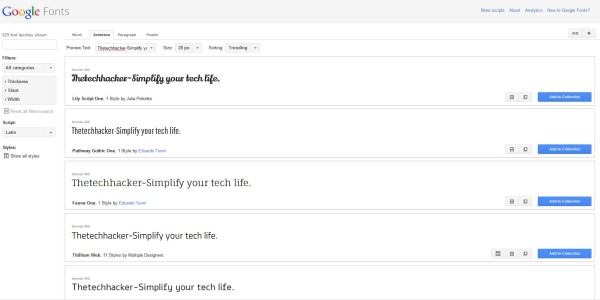
- Go to the Google Fonts web page and “Add to Collection” button.
- You can add as many as fonts you want to download.
- Once you’ve done, click on down arrow tab on right-top corner of the web page to download the font.
- In the next step, you can choose the method by which you would like to download the fonts to your computer.
Updated – How to Download and Install Google Fonts on Windows
Google Web Font, what is that? I’m guessing that some of you are asking this question. Google Web Font is a collection of open source fonts at one place. The collection has over six hundred different types of fonts. Users of these fonts are normally designers and webmasters who use it for their local projects.
You can see these fonts applied online on different websites that you visit. What you need to know is that you can get these fonts to use on your PC. You can use it on publishing software like Photoshop and Microsoft Office.
To get these fonts, you need to install the fonts on your PC either by doing it yourself or via a third-party tool. Third party tools might prove to be tedious or at the very least complicated. Despite what you might think, it’s really simple to install these fonts. Let’s look at the steps on how to install Google web fonts on Windows.
Steps to Download and Install Google Fonts on Windows
#1. Go to Google Fonts web page and “Add to Collection” button
You need to visit the Google web font page. You could go through the myriad of fonts available or use the search box to look for your favorite font. Once you find it, click the “Add to Collection” button. At this point, you can add as many fonts as you’d like.
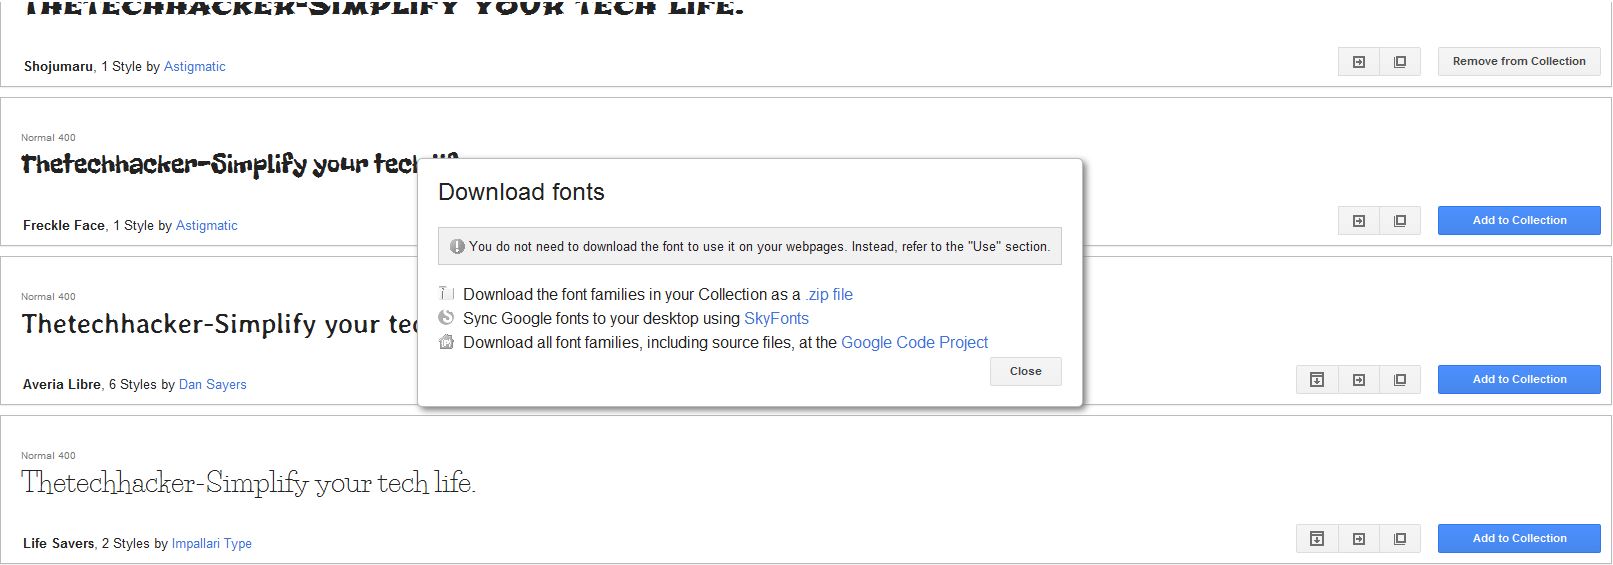
#2. Once you’re done, click down on the arrow tab on right-top corner of the web page to download the font
Once you’ve added all the fonts you’d like to download in the “add to collection” tab, check the right-hand corner as that’s where you’ll find the download button. This brings up the download fonts dialog.
#3. The last step is to choose the method by which you’d like to download the fonts to your computer
You’ll find a few options in the download dialog. The best one is to “download the font families in your collection as .zip file.” Clicking this will start the download of the font collection to your computer.
There are some few other things to do once the download is completed. They are basic things that you’d normally do even without these instructions. Once the download is done, extract the .zip file. Once the extract process is done, select all the files, right click and choose the install option. This will install all the downloaded Google web fonts to your computer.
Conclusion
Once this is done, you can use the fonts in any application on your PC. Be it Notepad or Microsoft Office, you can now enjoy these fonts. To uninstall these fonts, you simply visit the control panel. Select fonts, and you’ll see all the installed fonts.
Select the one you’d like to remove. The next step would be to click the delete button located on the toolbar, and that’s it. The font will be removed from your PC. Have you ever used any of the Google web fonts? Which one appeals the most to you?