


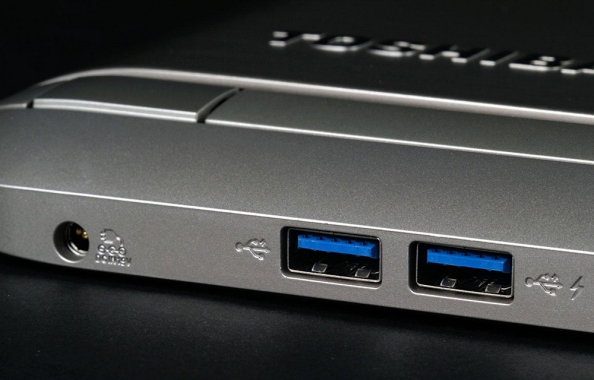
USB ports are essential for the day-to-day operations on the computer. Without a USB port, you will not be able to connect most of your devices such as Flash storage, Card Readers, USB Dongles, External HDDs, etc. Sometimes, even if you have the USB ports and they are no longer working, you will face the same problems. If you are facing the USB port problems, this guide might help you. Today we are going to share some of the most effective methods to fix USB ports without spending a single penny.
Methods to Fix USB Ports
We handpicked some of the most effective methods from various sources and hardware technicians. Be sure to follow these methods in the same order as given below. It will help you to try the easiest methods before stepping into the complex ones. So, here are the methods to fix USB ports.
1. Scan for Hardware Changes
Sometimes, some sudden hardware changes can cause the USB port to be unresponsive. For example, if you insert and remove a USB drive to the port so quick (almost instantly), few systems will find it difficult to understand what just happened. They will not be able to detect the hardware changes so quickly. In such situations, your USB port will stay unresponsive until your restart your PC or even further.
To the fix such problems, manually scanning the hardware changes could help. To scan for hardware changes in Windows, follow these steps.
- Press Win+R keys together to launch the Run command box.
- Type devmgmt.msc in the Run, and then click OK.
- Now the Device Manager window will open up. Click the Device Manager option in the left sidebar.
- In the upper menu, click Action, and then click on Scan for hardware changes.
Now, the Windows will start looking for the hardware changes. Check if the USB problem is fixed. If not, continue the methods below.
2. Restart your Computer
Like already mentioned, a simple restart could fix almost any temporary issues with your PC. If the USB is not being recognized due to a temporary issue with the hardware or the OS, restarting your PC will refresh the entire system and make the USB working again. Before restarting, be sure to detach the USB devices from the ports (except the mouse and keyboard) so that the restart will be effective.
3. Disable and Enable the USB Controller
The next thing you could try is disabling and re-enabling the USB controllers in your computer. Like we did in the first method, you have to do this too in the Device Manager. To disable and enable the USB controller follow the steps given below.
- Press Win+R keys together to launch the Run command box.
- Type devmgmt.msc in the Run, and then click OK.
- Expand Universal Serial Bus controllers option at the right side.
- Right-click the first USB controller under Universal Serial Bus controllers.
- Click Disable. Confirm the action if prompted. Then right click the items again and click Enable.
- Repeat the same for all the items.
- Now, restart the computer.
4. Uninstall USB Host Controllers
Similar to the last method, but instead of disabling the USB controllers, we should uninstall it. Uninstalling the USB host controllers fixed the USB unresponsive issue most of the times (as per our readers.) So, if any of the above methods doesn’t fix the USB errors, you could uninstall USB host controllers on your PC. To do this,
- Follow the steps 1, 2, and 3 in the previous method.
- Right click on the option saying USB Host Controller.
- Click on the Uninstall option.
- Repeat the same for any other USB host controller.
- Restart the computer.
You don’t have to worry about losing anything through this uninstallation. Windows will automatically reinstall the uninstalled USB host controllers upon restart. This might fix the USB problem.
5. Disable USB Selective Suspend Feature
For those who don’t know, USB Selective Suspend is a Windows feature which disables the power flow to the USB ports while it is not being used. This is a nice feature which allows the computer to save power. But in rare cases, it might create some problems. So, disabling this feature may help you in fixing the USB issue. To disable USB Selective Suspend, follow these steps.
- Open the registry editor by typing regedit in the start.
- The registry editor will open up.
- Navigate to HKEY_LOCAL_MACHINE > SYSTEM > CurrentControlSet > services > USB and the DisableSelectiveSuspend.
- Right click on it and select Modify.
- A new window will open up. In the Value field, type 1.
- This will disable the USB Selective Suspend feature in Windows, and the USB ports will start receiving the power constantly. If this doesn’t fix the problem, be sure to revert the changes.
6. Check if the Hardware is Damaged
The last and final thing you should check is the problems with your hardware. If there are any visible damages to the USB ports or you see anything inside the port which blocks the USB from staying properly, you should inspect it.
To check for the hardware problems, there are numerous free tools available online. Just use one of them to confirm that your ports are working properly. It is also recommended that you visit the nearest computer service center to get the problem fixed. But for your knowledge, the USB port damages are extremely rare. If you didn’t drop your device or tried anything stupid, you don’t have to worry about it.
Did you fix your USB ports? Or the problem still exist? Do let us know through your comments.