


For millions of professionals all over the world, Microsoft Word 365 is an essential piece of software. It provides a wide variety of functions and features, ranging from the most fundamental aspects of text processing to the most complex aspects of design. Your documents can be elevated, making them more aesthetically appealing and engaging, thanks to a feature known as the capacity to create unique shapes. This is one of the features. A paper that has been carefully organized will have a greater influence on its readers.
In this blog post, we will walk you through the process of designing and inserting custom shapes in Word 365, step by step.
Step 1:
Open Microsoft Word 365 To begin, open Microsoft Word 365 and create a new document, or open an existing document where you’d like to add a custom shape. Navigate to the ‘Insert’ tab located in the upper left-hand corner of the Ribbon.
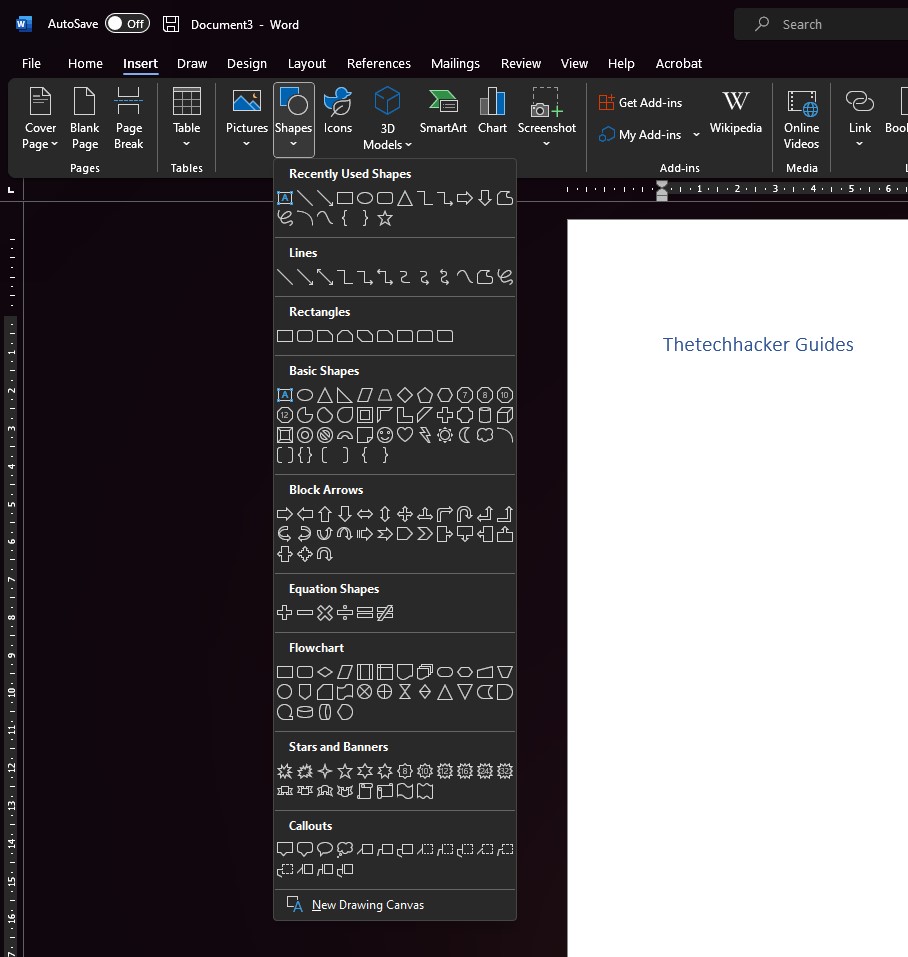

Step 2:
Use the Shapes Tool Within the ‘Insert’ tab, locate the ‘Shapes’ button in the ‘Illustrations’ group. Click on the ‘Shapes’ button to reveal a dropdown menu containing a variety of pre-existing shapes you can insert into your document.
Step 3:
Choose the ‘Freeform’ Tool Scroll down through the shapes menu until you find the ‘Lines’ category. In this category, you’ll see a tool called ‘Freeform: Scribble.’ Click on this tool to select it.
Step 4:
Draw Your Custom Shape With the ‘Freeform: Scribble’ tool selected, move your cursor over to your document. Click and hold the left mouse button while you draw your custom shape. Release the mouse button when you’ve completed your shape. If you’d like to create a closed shape, make sure to connect the start and end points of your drawing.
Step 5:
Edit Points to Refine Your Shape Once you’ve drawn your custom shape, you might want to make some adjustments to the points or curves. Right-click on your shape and select ‘Edit Points’ from the context menu that appears. You can now click on any point to select it, and then click and drag it to a new position. You can also adjust the curve handles to create smoother curves or sharper angles, as desired.
Step 6:
Customize Your Shape’s Fill and Outline After you’ve perfected the shape itself, you can customize its appearance by changing its fill color, outline color, and outline weight. To do this, click on your custom shape to select it, and then navigate to the ‘Shape Format’ tab in the Ribbon. From there, you can choose from various fill and outline options in the ‘Shape Styles’ group.
Step 7:
Add Text to Your Custom Shape (Optional) If you want to add text to your custom shape, right-click on the shape and select ‘Add Text’ from the context menu. A cursor will appear within the shape, allowing you to type directly onto it. Format the text as desired using the options available in the ‘Home’ tab.
Step 8:
Save Your Custom Shape as a Picture (Optional) If you’d like to save your custom shape as a standalone image file for future use, right-click on the shape and select ‘Save as Picture.’ Choose a location on your computer to save the file and select your desired file format (e.g., JPEG, PNG, GIF).
Step 9:
Group and Arrange Shapes (Optional) You can also combine multiple shapes to create a more complex design. To do this, hold down the ‘Ctrl’ key while clicking on each shape you’d like to group together. Once all shapes are selected, right-click on any of the selected shapes and choose ‘Group.’ You can then resize or rotate the grouped shapes as a single unit, or use the ‘Arrange’ tools in the ‘Shape Format’ tab to layer your shapes as needed.
Conclusion:
By using the above steps, anyone can add custom shapes in Microsoft Word 365. Let us know your feedback in the comment section below.