
GIFs are funny, creative, and always enjoyable. So, it is natural that you also wanted to create one. If you have been searching for a way to create GIFs, you might have already found plenty of online/offline solutions to do so. But if you haven’t, here we are sharing the steps to create GIF files just using the Photoshop photo editor. If you follow the steps given at the bottom very carefully, there is nothing difficult in the way. If you are not experienced with the Photoshop, just see the screenshots and follow them one by one.
For this tutorial, we will be using the Adobe Photoshop CS6 version. So, if you already haven’t installed the Photoshop in your PC, do it. If you are using any older versions of the Photoshop, the steps may slightly vary, but not much. Without explaining the things too much, let’s have a look at the steps to create a GIF using Photoshop.
Create a GIF Using the Adobe Photoshop
- First of all (assuming that you already have the Photoshop installed on your PC) open the Photoshop.
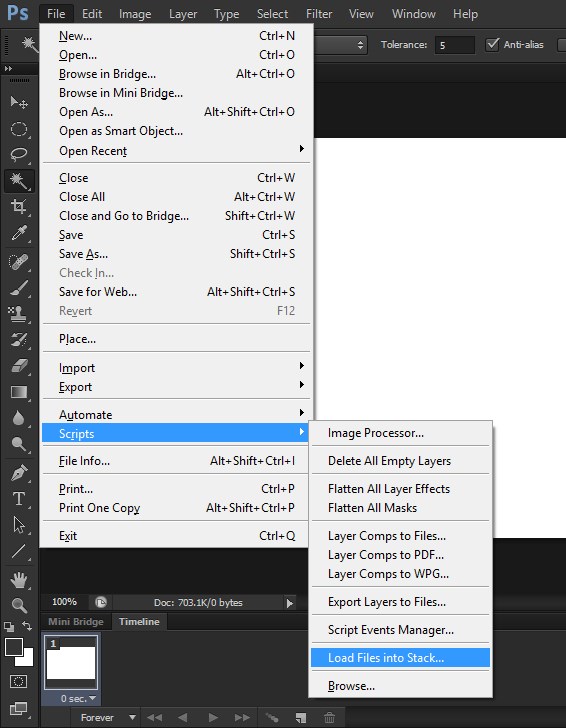
- In the menu bar click File > Scripts > Load Files Into Stack option.
- It will open the Load Layers window
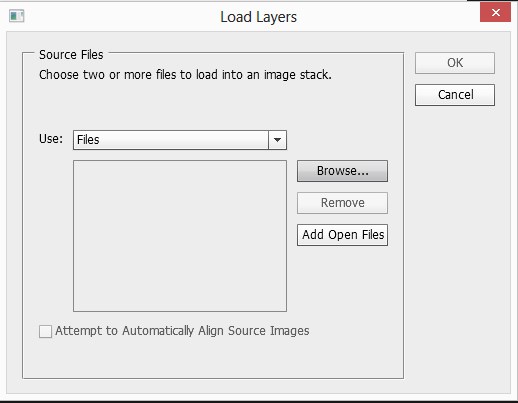
- Click the Browse button on the screen.
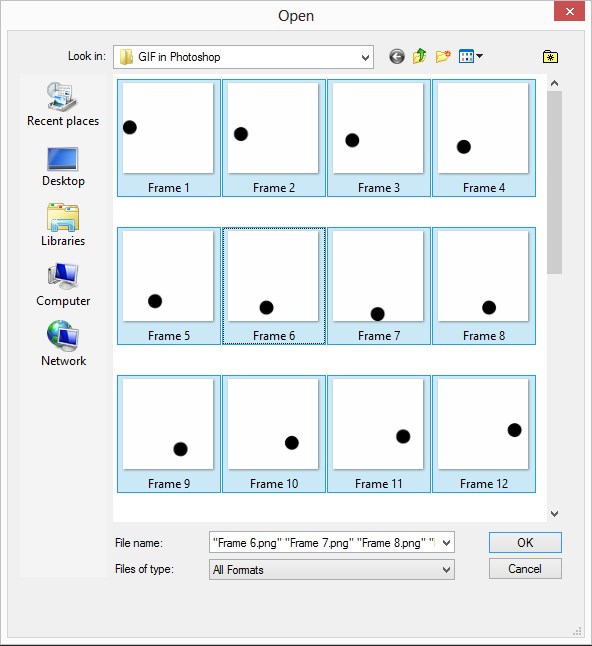
- Now, select the pre-created images. If you want transparency with your GIF, be sure to use the PNG images with transparency.
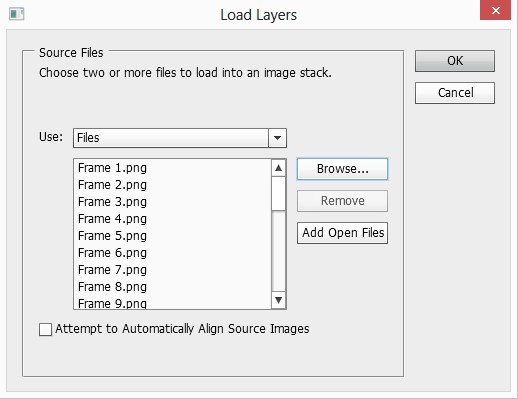
- It will load on the Load Layers window, and you can see them listed on the left side. Now, click the OK button.
- It will now display all the layers on the Photoshop layers section. You might want to wait a few seconds based on the number of layers that you want to include in your GIF. So, be patient.
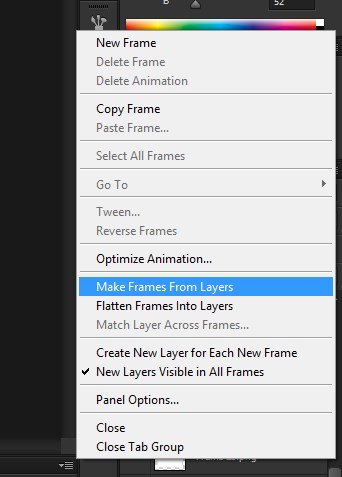
- After loading all the layers, click on the options icon at the right side of the Timeline section located at the bottom of the Photoshop screen. If you can’t see the Timeline section already displayed on the screen, just click on the Windows menu bar option and click on the Timeline. It will display the Timeline now. After that, choose the Make Frames from Layers option. It will create new frames from each one of your layers.
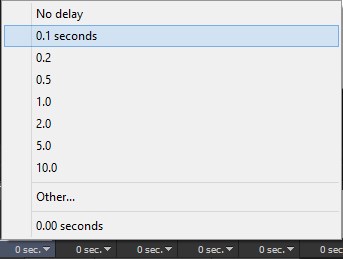
- Now, under each frame, you could see the delay time. Change it as per your requirements. To change all at ones, select all of them by holding Ctrl button and click on each one them, then change the time of any one frame.
- Now, to preview your GIF, just click on the Play button in the Timeline controls section. If the GIF looks good, you are ready to save it. If not, make the necessary changes to make it perfect.

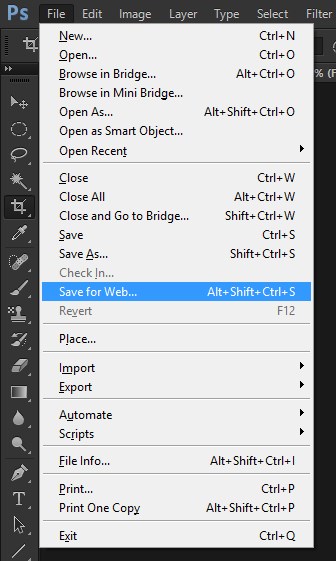
- Go to File > Save for Web option.
- Choose GIF as the file type and click Save.
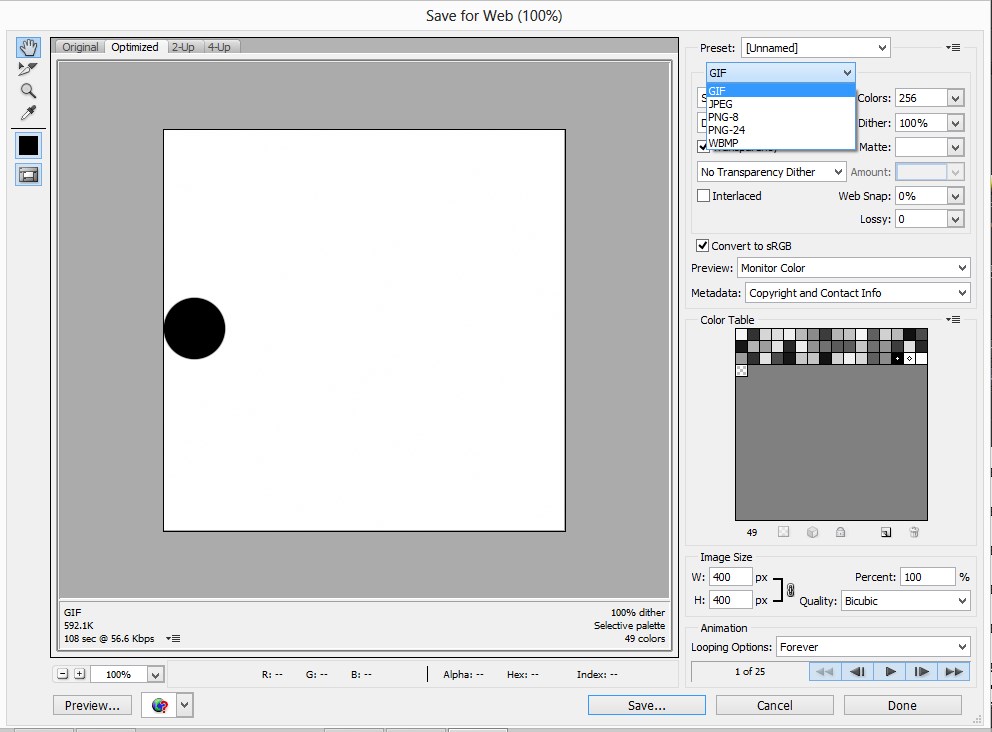
- That’s it, give your GIF a name and save it. You got your beautiful GIF. Ours was looking like this 😉


This is just an article to show you how to create a GIF animation using the Photoshop. The possibilities are limitless. You could create professional GIFs using the Photoshop. So, give it a try. Also, have a look at our article on how to convert AVI video to GIF.