


Wuauserv error has encountered for many Windows 10 users. It drastically slows down the performance of the Windows 10 PC or laptop while it is running in the background.
Usually, many services like svchost.exe and Windows update runs in the background and consumes a very low amount of system resources. But in the case of Wuauserv, it is running quite differently and consuming excessive amounts of system resources. It consumes a lot amount of processor and slowdowns the performance. If your PC or laptop running Windows 10 suddenly started slowing down, check the Task manager to find the Wuauserv running or not.
It is usually active when Windows is trying to download new updates for you. During the latest updates download process, the Wuauserv appears along with Windows update service.
If you are facing the PC or laptop slow down issue caused by Wuauserv, there are many fixes available to solve the issue.
Method 1: Wait until the update process complete
As I told above, the Wuauserv active only when the Windows is trying to download the latest updates for your Windows 10 PC or laptop. To check the update status of the system follows the below steps.
- Press Windows key+I to open Settings on your computer.
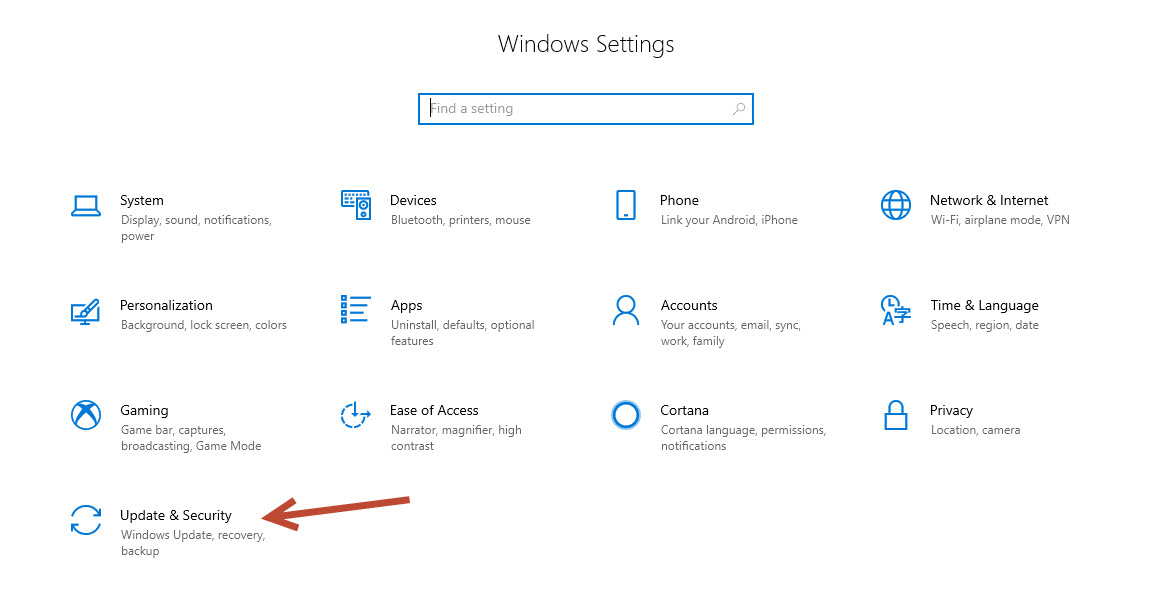
- Now click on “Update & Security” settings.
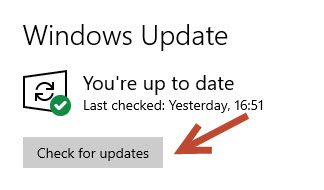
- Here, on the right pane click on the “Check for Updates”.
- Now Windows will check for updates and then it downloads if any updates available.
- Once the downloads finish, the system tries to perform a restart to apply changes.


It is better to allow some time for the system to perform an update process. If you keep the PC or laptop unused during the download and update period, the process will quickly finish.
After the restart, check the Wuauserv activity in the task manager. If it is still present in the Task Manager and consuming high system resources, follow the next method.
Method 2: Uninstall recent Windows updates
Some updates will cause the “Wuauserv having a high CPU usage” error in the background. If you are unsure about the update, you can follow the below steps to uninstall the most recent Windows update from your machine.
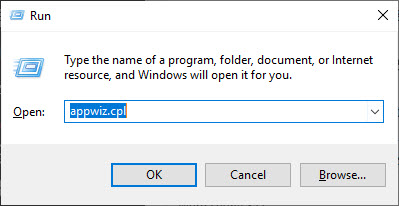
- Press Windows key+R to launch run and type “appwiz.cpl
- Now on the left pane, click on “ View Installed Updates”.

- Here, in the Installed updates window, under the “Microsoft updates” section, check for the recent update.
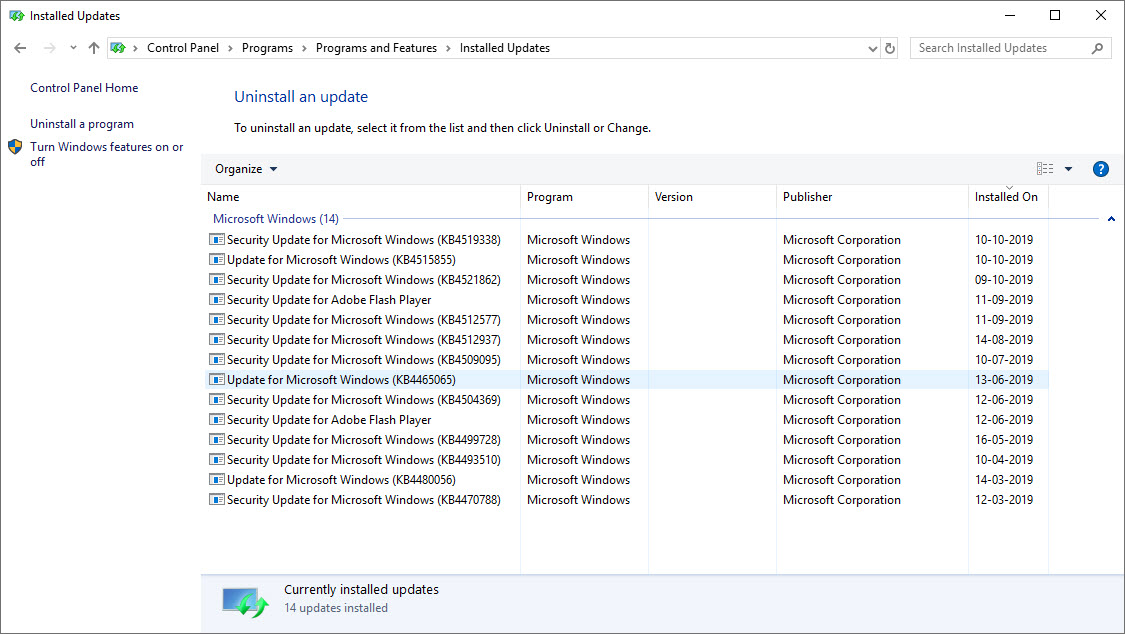
- Now, click on the problem causing update and click on yes to uninstall the update.
- Once the uninstallation finishes, now the machine tries to restart.
- After reboot, check if you are still facing the issue or not.


If you are still facing the issue, go for method 3.
Method 3: Disable Windows update service
- If the problem still persist you can disable the Windows 10 update service. To disable the service, follow the below steps.
- Press Windows key+ R to launch Run. Or you can directly type run in Windows search.

- Now type “services.msc” and click ok.
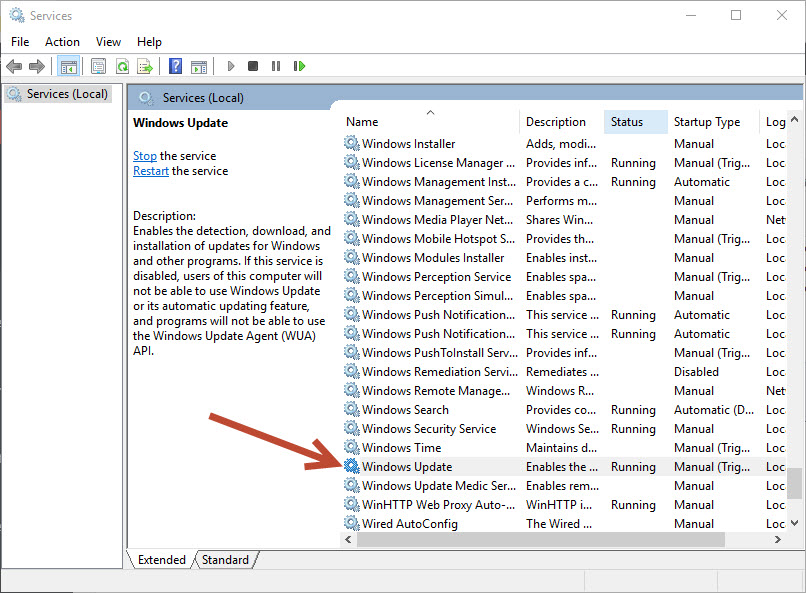
- It will open the service’s utility and here find the “Windows Update” service and double click on it to open its properties.
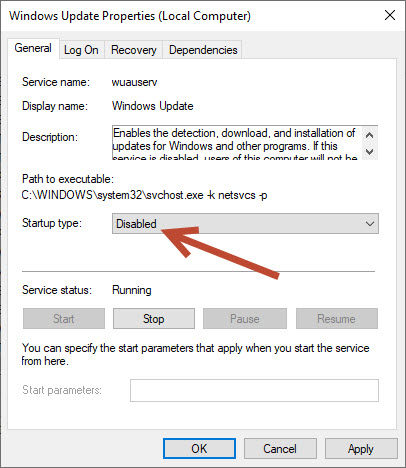
- In the properties, click “Startup type” and select “Disabled” from the drop-down.
- Now, click on “Apply” and “OK”.
- Now reboot the system to change take place.


Method 4: Delete the SoftwareDistribution folder
The SoftwareDistribution folder contains many temporary files that are used to fetch the latest updates from the servers. It is a known fact that deleting files in the SoftwareDistribution folder solves many types of errors during the Windows update. If the Wuauserv is still causing trouble even after applying all the above methods, try this technique to finally fix the issue.
- Press Windows key+R to open the command prompt.
- This will need admin access, so open cmd with “Run as administrator”.
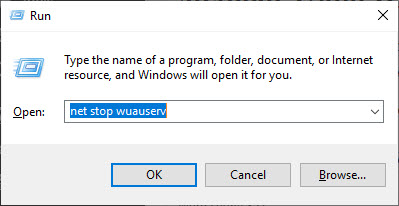
- Type “net stop wuauserv” and press enter to execute the command.
- Now type “net stop bits” and again execute it by hitting the enter button.
- Now minimize the command prompt window and open File Explorer.
- In the File Explorer go to C:\Windows\SoftwareDistribution.
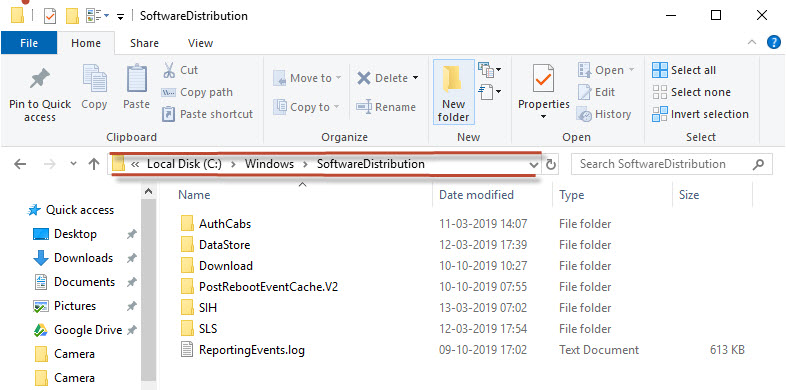
- Now delete all the files in the SoftwareDistribution folder.
- Restore the minimized CMD window and type “net start wuauserv” and hit enter.
- Next type “net start bits” and again hit enter.
- Now check the CPU usage by opening the Task Manager.

If the CPU is back to normal, it means the above method is worked. If the problem still persists, proceed to the final method.
Method: 5 Stop Wuauserv
If all the above methods failed miserably, stop the Wuauserv process. This is the last and final method to completely stop the Wuauserv activity on your Windows PC or laptop. Stopping the Wuauserv will completely free your system resources. To disable the Wuauserv, follow the below steps.
- Press Windows key+R to open the run.
- Here, type “services.msc” and hit enter.
- Here double click on the “Windows update”.
- In the General tab, set startup type to Disabled and click stop.
- Now click on apply and then ok to finish the job.
- Restart the computer to changes take effect.
These are the ways to stop Wuauserv causing trouble to your PC. Which method worked for you? Comment your experiences and technical issues faced during the process in the comment box below.