


Microsoft builds every Windows version bind to Windows Live Account. Starting from Windows 8 to Windows 10, Microsoft made logging with live account must for their users when you do a fresh install. The user needs to log in every time when they reboot or switch between accounts. It is useful to secure your PC with a strong authentication. Windows Live account is associated with Microsoft products like live mail, Skype, Windows Store etc. In the Windows installation process, it asks to enter your Windows Live account details to secure your machine. If you enter these credentials during the installation process or while using it asks to enter a password every time when you switch on PC.
Steps to disable login screen in Windows 10
For a work computer, it is always advisable to secure your machine with a strong security. If you are a home user and less bothered about your PC security Login screen is a painful process to do every time. You can easily ditch login screen feature in Windows 10 with a simple trick.
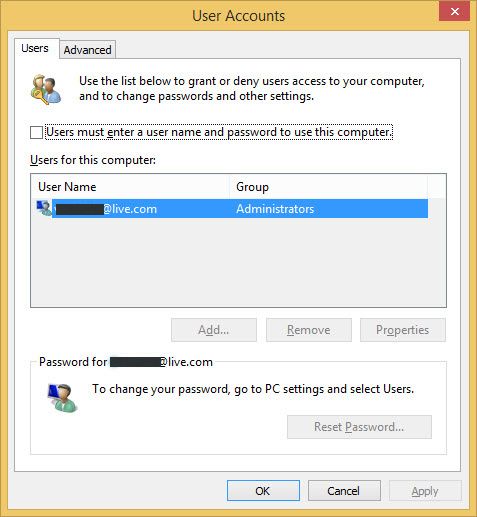
All you need to open “Run” option by Right clicking on the start button or search using Windows search box. Or you can bring run command by pressing Start+Win keys. When the Run box opens type “netplwiz” and hit enter, this will pop up a User Accounts window.
Here in the User Accounts Window uncheck the box “Users must enter a username and password to use this computer” and hit on click apply. Here you need to enter your Windows Live ID password for the final time to apply changes. Now you can test the result by restarting the PC. That’s it, now onwards you don’t face Windows login screen. This process is same for Windows 7, Windows 8, 8.1 and Windows 10.
That’s all for now. Please do share your views and feedback in the comment box below.