


OneDrive is one of the most sought-after cloud storage solutions across the digital world. Millions of users trust OneDrive for storing all their important data in a safe virtual locker. Many of them selected it as their cloud storage platform just because of the 5GB Free storage provided by the company.
You might also be one of that kind who cares a lot about the OneDrive storage. Many of you may be music crazes and might be storing your favorite songs on the cloud for listening to them on the go. How would it be if your songs duplicated accidently and consuming many MB’s for the same file? Some of the valuable space in the OneDrive eaten by duplicate songs is heartbreaking for you.
So, in this article, I am gonna give you the steps to remove the duplicate songs from OneDrive. Let’s have a look.
Remove Duplicate Songs Manually
Just like various other cloud storage solutions, OneDrive also comes with a desktop application. Having a desktop application installed in your system makes storing data in the cloud even more convenient yet safe for you. All you have to do is to drag and drop the files you want in the cloud to the OneDrive folder, and they will be automatically synced to the cloud within seconds! It can’t get any easier than that.
Note: In most cases, OneDrive automatically suggests to you to install the desktop application while you’re setting it up. If you’ve already installed it, jump to step # 6 directly.
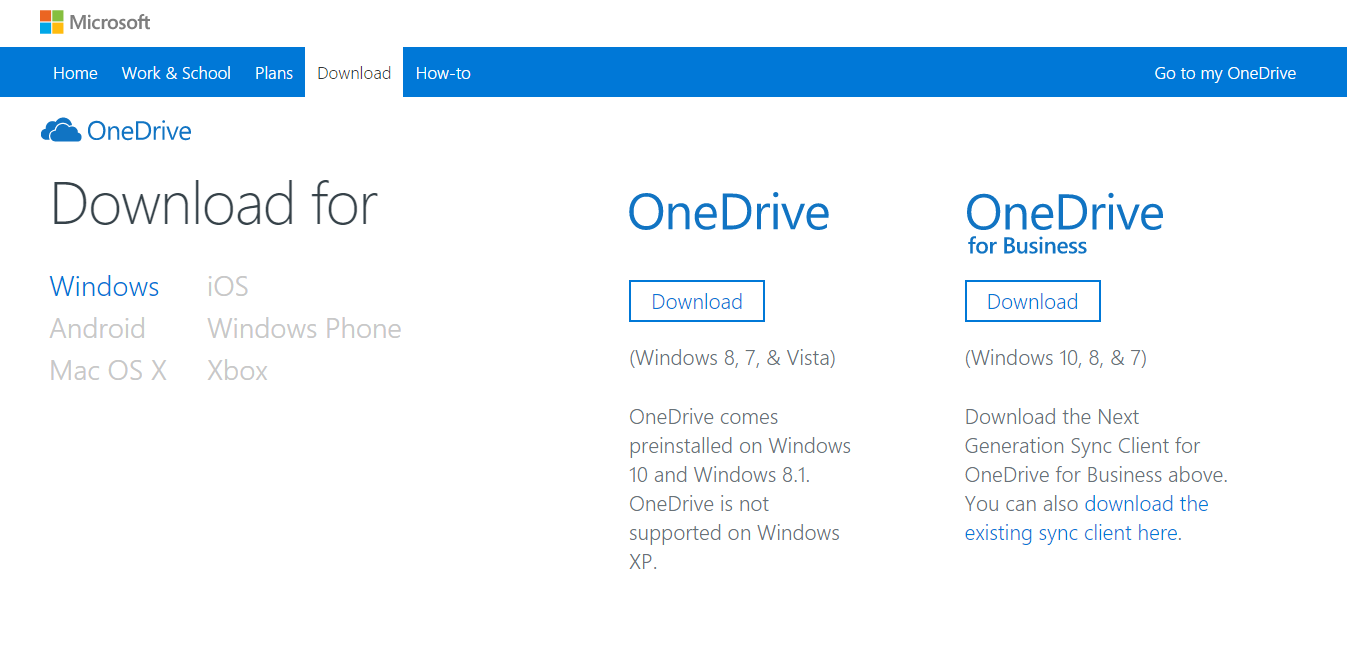
- Download the OneDrive Desktop application from their website. If you are a business user, you want to go for the business version of the desktop application option as provided.
- After downloading the application, follow the onscreen instructions to install it.
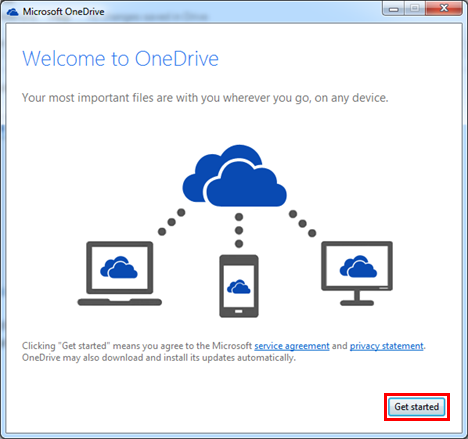
- The installation wizard will ask you to provide your login credentials. Fill them in and the application will automatically create a folder named as OneDrive on your computer and create a desktop shortcut as well.
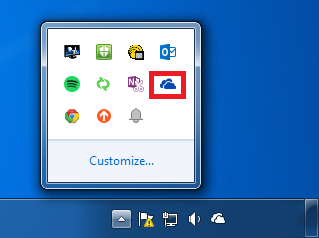
- OneDrive desktop application will now start syncing your files from the cloud to the OneDrive folder on your computer. You can track the sync progress via the OneDrive icon on the Taskbar.
- OneDrive desktop application will now start syncing your files from the cloud to the OneDrive folder on your computer. You can track the sync progress via the OneDrive icon on the Taskbar.
- OneDrive desktop application will now start syncing your files from the cloud to the OneDrive folder on your computer. You can track the sync progress via the OneDrive icon on the Taskbar.
Note: You could also search any other Music formats like .wav, .dct etc… instead of .mp3. - Click the “View” tab on the top bar of the window and Click on the “Group by” icon.

- OneDrive desktop application will now start syncing your files from the cloud to the OneDrive folder on your computer. You can track the sync progress via the OneDrive icon on the Taskbar.
- Manually find and delete all duplicate songs to free up storage space.


Note: In most cases, the duplicate files get the same name as the parent file has followed by the word (copy). So if you have a file named as Song, it’s duplicate will most probably be named as Song(copy).
Remove Duplicates using Clone Files Checker
A more efficient, accurate and reliable method to weed out all dupes from your OneDrive would be to use Clone Files Checker. It is a very user-friendly program that helps you scan and remove duplicate songs across all file formats from any hard drive/folder you specify. To do so, follow the steps given below.
- First of all, Download and install the Clone files checker tool from their website.
- After the installation completed, Right click on the OneDrive desktop icon and select “Scan with CloneFilesChecker” option from the context menu.
- Now, the software window will open up.
- Set “All Files” under search options.
- Now, Click the “Start Scan” button.
- The scan will initiate now. Be patient and let it complete. Once the scan is over, you’ll be presented with 2 options. You can choose from Quick Fix to fix the duplicates automatically or Review & Fix to manually delete the duplicates after reviewing them.
- Select the appropriate option and continue the process.
- After the cleanup is over, the changes you made in the local OneDrive folder will be replicated on the cloud as soon as the sync process gets over.
Conclusion
If you are a die-hard music lover, you surely have a huge collection on your laptop and probably on the cloud as well. But never ever tolerate those duplicates that are good for nothing and eat up invaluable disk space by clogging it unnecessarily. Fix them by making use of either of the above-mentioned steps to make the most of your OneDrive allocation.