


Apple has been the best when it comes to user interface. They have one of the easiest ways to access any settings, and all the settings are categorized the right way. Apple although is the best when it comes to UI, but it does lack in some of the different settings, where you will have to keep your heads revolving to solve those. One such thing is removing the payment information. Although the Apple has their support which can solve the same within a few minutes, you will have to spend a few minutes to get your solution.
For purchasing paid apps, games, books and songs in iTunes it asks your Credit Card information. It is necessary to make payments for purchasing stuff on Apple Store. Without credit card information you are not able to make purchases at Apple Store. However, this is not mandatory for an Apple ID. During the Apple ID creation, it asks you to enter your Credit Card details for purchases. If you want to go with the free stuff, you can skip payment information step by opting for “None” in the list.
If you are already added your credit card details while setting up your iPhone or any other iOS device and planning to remove the information from Apple ID then this article is for you.
Why do you need to remove Credit Card details from Apple account?
There are many reasons for removing credit card information from iTunes. Many people feel it may be unsecured leaving the credit card info on the internet. Also, sometimes mistakenly purchase unwanted Apps, they may cause a deduction from the credit card with a single tap of purchase.
If you are subscribed to a service and you no longer want to continue the subscription and the credit card is blocked or expired, then you have to remove the existing credit card information from your Apple account. These are the most common reason for removing credit card details from the Apple ID.
We can help you to solve the same without wasting a few minutes calling the Apple support. Here are the steps to change or remove your payment information. Do note that if you are changing the payment info, then you have to have the same name and same information as the last one.
- Head to settings then to your profile named as [Your name], then Payment & Shipping.
- Tap on the payment methods, and then edit to change them.
- If you are looking to change or remove the payment method you have currently, then scroll to the bottom page and tap on change payment method. You can select one from None or chose a different method as per your choice.
- Once you are adding a new payment method, do note to add the same information as you have on your financial institution.
- Click on save.
How to Remove Credit Card Information from iTunes?
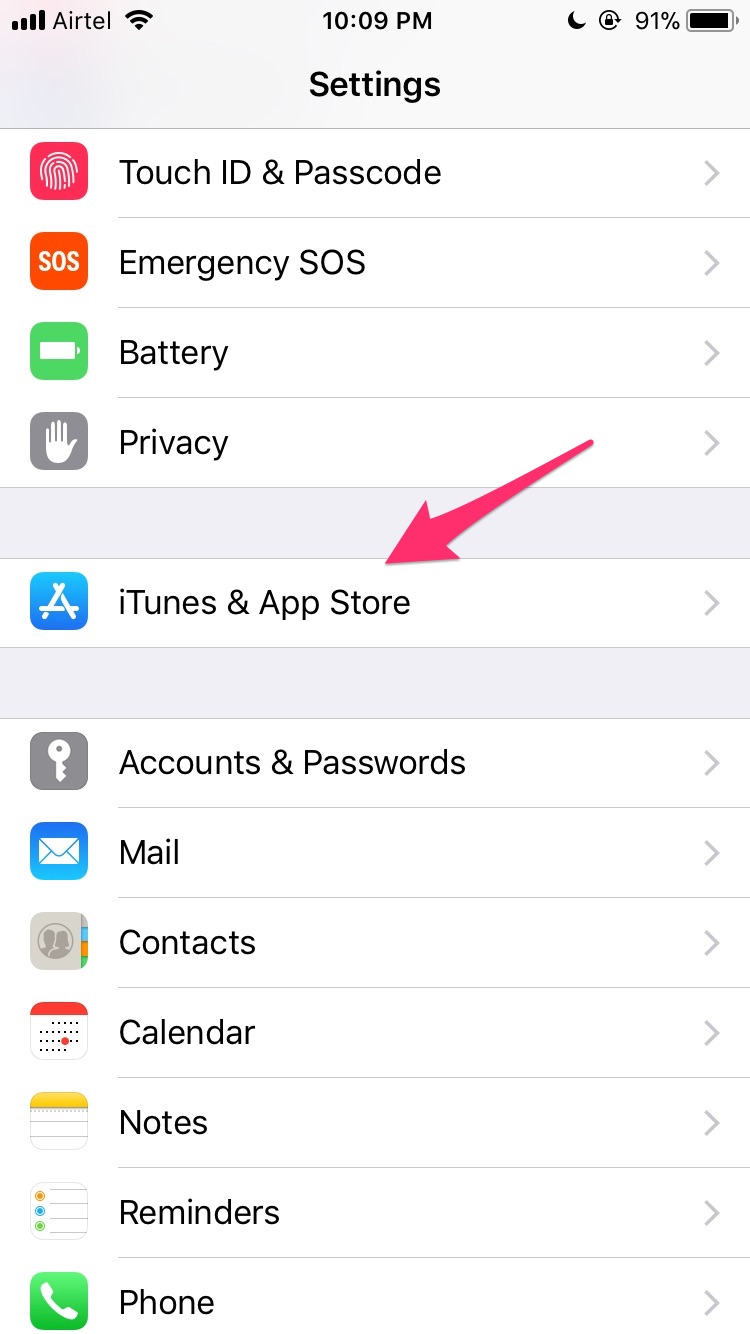

- Open Settings on your iOS device.
- Here, select iTunes & App Stores.
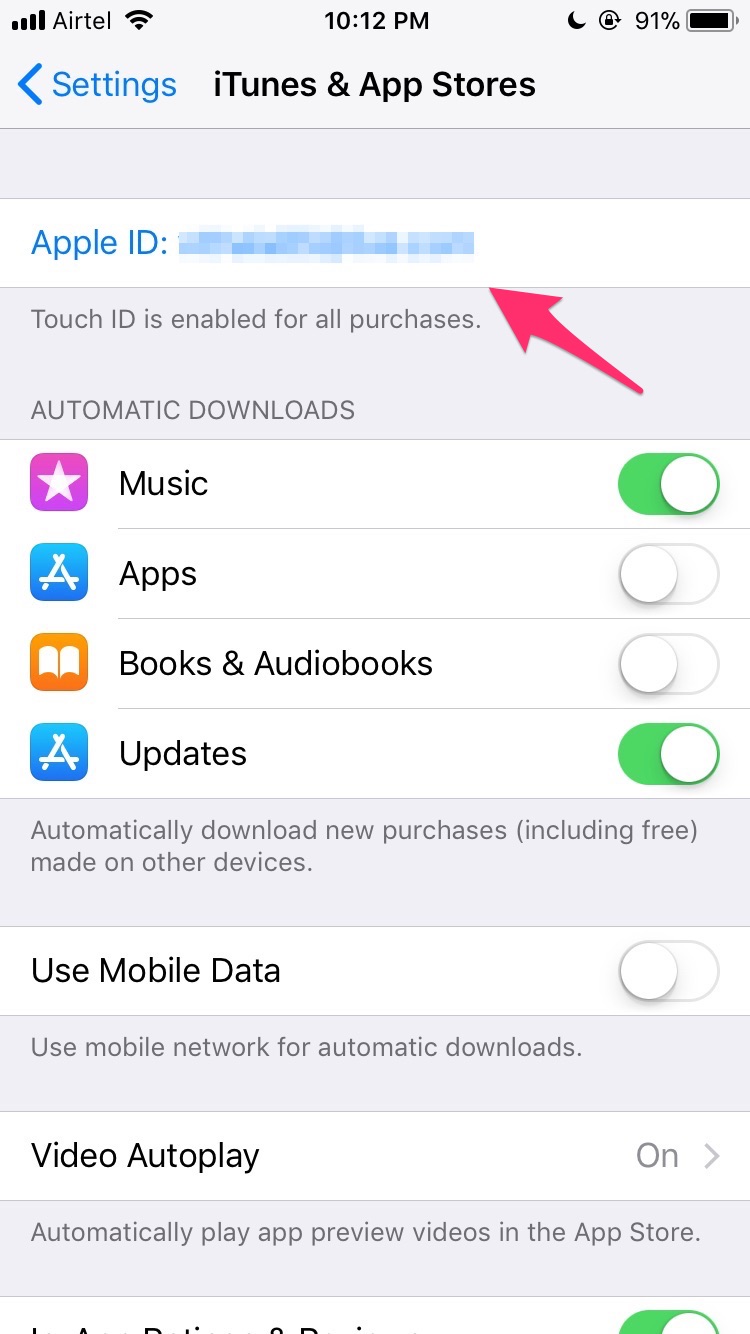

- Now tap on your Apple ID at the top.
- Here select View Apple ID.

- Now tap Payment Information.
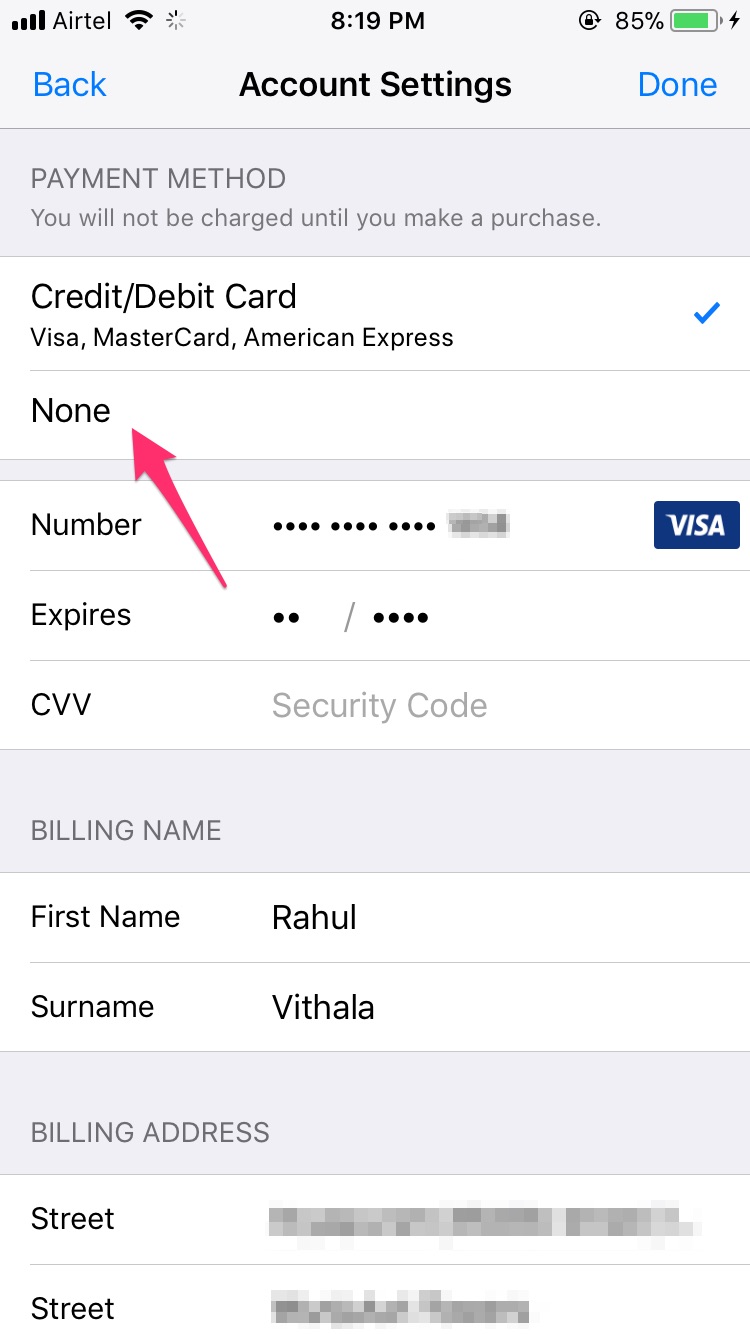
- Here you will see a list of Payment Methods available.
- Now change the option from Credit/Debit Card to None.
Now if you don’t find “None” option on the third step then you will not be able to remove the payment information, for it, you have to follow the given steps, and it can help you get the option back, and remove your existing payment information. First, there are few reasons why you are not getting the “None” option.
- Unpaid balance left, or upcoming payment is due.
- Having automatic renewal subscriptions
- If you are using iTunes store or App Store for the first time.
- If you are in another country than you were present at the time of creating the Apple ID.
- If you are a part of family sharing.
If any of the above reason is associated with your Apple ID, you will have to first solve the same, and then remove the credit card. If there is any other reason apart from these, you will for sure have to contact apple support, and they will help you with the full procedure to remove your payment information with your account.
Although you can block the credit card to be used for Apple ID by calling your financial institution, it is a long way, and the short way is to contact Apple. If there is still an issue, you can any day create a new ID by closing the ID you are currently using.
Now your credit card has been successfully removed from your Apple ID, now onwards you don’t have to worry about unauthorized or unwanted purchases from Apple Store.
Have you been to any such other situations due to Apple support? Or have you not been using your device do the same? Do let us know in the comment section below.