

Windows 10 is the latest operating system from Microsoft. The new Windows 10 is built with a lot of new changes and features along with compatibility with Mobiles and PC. Many PC’s and Laptops are started receiving Windows 10 update.
As a new OS in some cases, it faces hiccups while loading and booting. In worst case scenario the system even crashes and files getting corrupted. To avoid these issues, a recovery drive is a good option. A recovery drive can fix issues like booting errors, system crashes and even starting problems. In detail Windows 10 Recovery Drive will allow you to boot your system and easily access a number of recovery and troubleshooting tools that you can use to fix a corrupted installation.
Normally we see recovery image CD comes with newly bought laptops and desktops with genuine versions of Windows OS. The recovery image stored in a separate location on your PC or in a USB drive to help you to recover from the above-discussed issues.
In this tutorial, I will guide you to create a recovery drive in Windows 10.
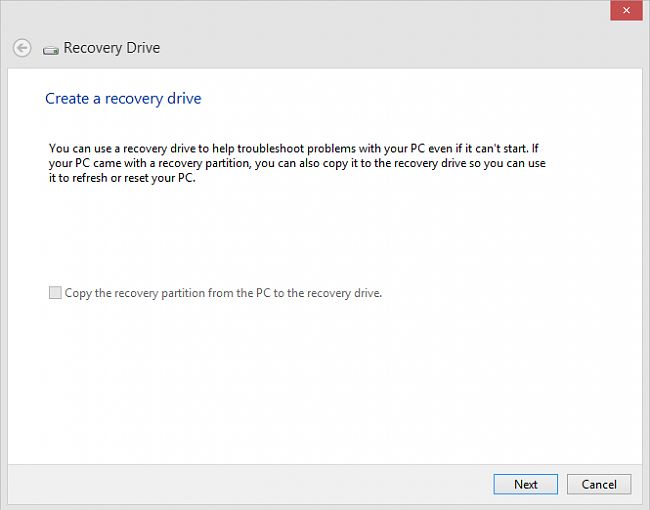
To create a separate and dedicated recovery drive click on the start menu and search for “recovery drive”. The first result you will get the option and click on it. It opens a new window and asks to create a recovery drive. Check the option “Back up system files to the recovery drive” and proceed to next.
Now insert the USB Drive or Pen Drive to your PC with a minimum of 8GB or 16GB storage. Here select the drive you’ve inserted, the wizard will create an image of your Windows OS in the drive.
Next time when you face any issues simply insert the USB drive and recover your PC from the errors.
That’s all for now. Please do share your views in the comment box below.