
Google Chrome is very popular browsing among the netizens. In spite of having some hard truths like eating up RAM and slowing down your PC or Mac performance, Google Chrome is still loved by millions of people. Google is one of the best search engine available online with various search features.
Google uses spiders and web crawlers to search nook and corner of the Internet and provides the best search results to the users. Even with huge competition from privacy oriented search engines like DuckDuckGo, Search Encrypt, and many other popular services, Google still manages to rank top with various features. Due to the tempting features of Google Chrome, many people prefer making as their default search engine in their browser. In our previous article, we have published a detailed article on how to make Google as a default search engine in Google Chrome.
For users convenience, Google Chrome lets you manage your favorite search engine. The process is simple and very easy to change the search engines in Google Chrome. If you want to try a new search engine in Google Chrome, just follow the below procedures.
In today’s article, we will show how to manage and add new search engines in Google Chrome.
How to manage search engines in Google Chrome
- Open Google Chrome on your machine.
- Click on the three vertical dots located at the top right corner of the Chrome window.

- Now you will see a drop-down of options list and here click on “Settings“.

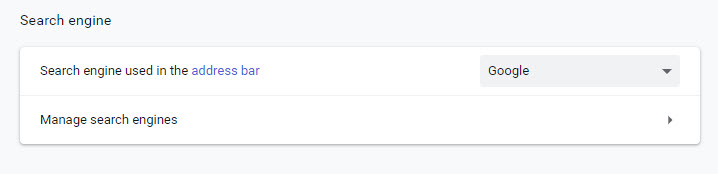
- Scroll down and you will see an option called “Manage Search Engines” and click on it.

- Once you click on the option, you will see a list of installed search engines on Google Chrome.
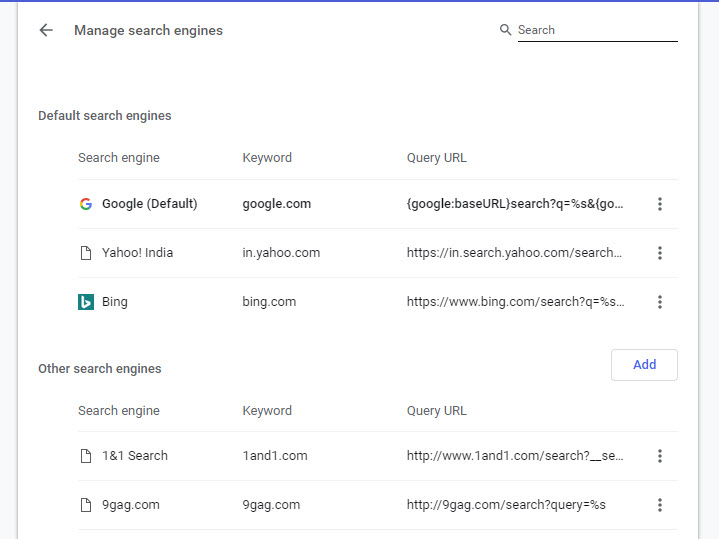
- On the top, you will see a list of installed search engines like Google, Bing, Yahoo, and DuckDuckGo.
- The other section of the window contains website specific search options. (For example, if you regularly search thetechhacker.com it will add as a search engine in the options. These are useful to search the internal articles of a particular site only.)
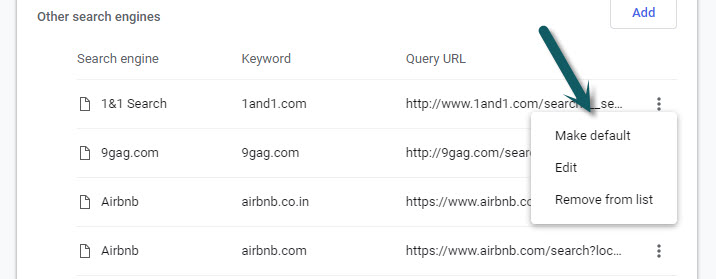
- To make it default or to remove a search engine from the available list, just click on the three dots available beside the name of the search engine.

- It will open a list of options like make it as default, edit and remove from the list.
- Choose your desired option to proceed.

How to add a new search engine in Google Chrome
Adding a new search engine involves similar steps as above. Here we have given a step by step tutorial for you.
- Open Google Chrome
- Click on the three vertical dots located at the top right corner of the Chrome window.
- Now you will see a drop-down of options list and here click on “Settings“.
- Scroll down and you will see an option called “Manage Search Engines” and click on it.

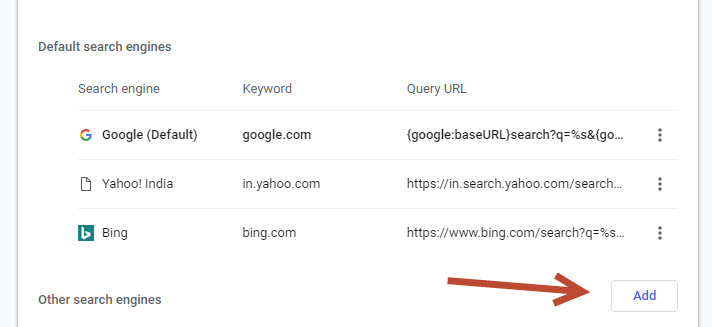
- Here you will see an “add” option at the end of the Default search engines list.
- Click on “add” option and enter the details of your new search engine and add to Google Chrome.
- To make it default, click on the three dots available beside the name of the search engine.
That’s it. It is very simple to manage search engines in Google Chrome.
Which search engine you use in Google Chrome? Let us know in the comment box below.
Leave a Reply