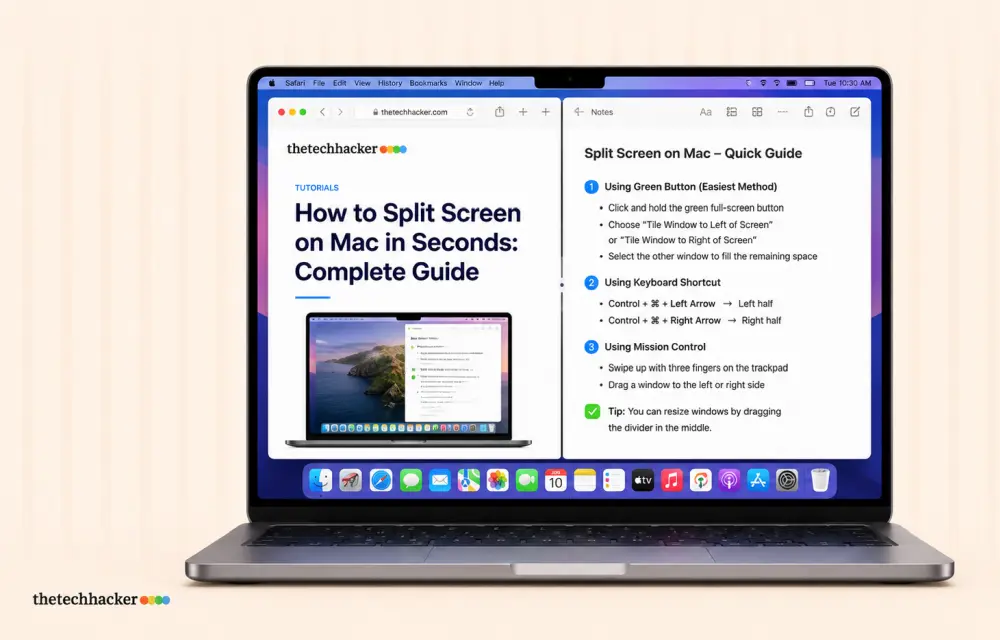
Viewing two apps side by side on your Mac boosts productivity and eliminates the constant switching between windows. Whether you’re comparing files, following a tutorial while you work, or keeping messages in view, the split screen feature helps you stay focused without juggling open apps. This guide walks you through exactly how to split screen on Mac using built-in tools.
What You’ll Need
- A Mac running OS X El Capitan (10.11) or later for Split View
- macOS Sequoia or later for built-in window tiling (drag-to-edge snapping)
- Two apps or windows that support Split View
If your Mac runs an older version or an app doesn’t cooperate, update your system or try a different app to access this functionality.
Why Use Split Screen on Mac
Switching between windows wastes time and breaks your concentration. Split screen solves that by keeping everything visible at once. Use it to:
- Run a video call next to your calendar
- View reference materials while drafting a report
- Keep two browser windows open without toggling between tabs
Once you track how often you flip between apps, the time savings become obvious.
How to Split Screen on Mac: Step-by-Step
Follow these steps to activate Split View and place two apps side by side.
Step 1: Open Your Two Windows
Launch the two apps, browser windows, or documents you want to display simultaneously.
Step 2: Hover Over the Green Button
Move your pointer to the green button in the top-left corner of the first window.
Step 3: Select a Tiling Option
Choose Tile Window to Left of Screen or Tile Window to Right of Screen from the menu that appears. The exact wording may vary slightly depending on your macOS version.
Step 4: Click the Second Window
The first window fills one half of the screen. Your remaining open windows appear on the other side. Click the second window to lock it into the opposite half.
Step 5: Adjust the Divider
Drag the vertical divider bar left or right to resize each side. Move your pointer to the top edge of the screen to reveal the menu bar or swap windows between sides.
Note: Dragging a window to a screen edge or corner for automatic tiling requires macOS Sequoia or later. On Sonoma and earlier versions, use the green button method described above. Holding Option while dragging on Sequoia reveals additional snap layout options.
Keyboard Shortcuts for Split Screen on Mac
If you prefer keyboard navigation, macOS offers a Mission Control path to Split View. Here’s how to activate it without touching the mouse.
Step 1: Open Your Windows
Launch the apps you want to tile.
Step 2: Open Mission Control
Press Control + ↑ (Up Arrow) or the Mission Control key (F3).
Step 3: Drag the First Window to the Top
Drag your first window to the Spaces bar at the top of Mission Control to create a full-screen space.
Step 4: Drag the Second Window onto the Thumbnail
Drag a second window onto the thumbnail of the full-screen space you just created. This pairs them in Split View, with one on the left and one on the right.
Step 5: Open the Split View Space
Click the Split View thumbnail to enter it. Use the divider to resize each side as needed.
Create Custom Keyboard Shortcuts
macOS does not include a universal keyboard shortcut that launches Split View with two apps directly. The shortcut Ctrl + Command + F toggles full screen for a single app only—it will not create Split View. To create your own tiling shortcuts:
- Open the Apple menu > System Settings > Keyboard > Keyboard Shortcuts.
- Select App Shortcuts and click the + button.
- Enter the exact menu titles Tile Window to Left of Screen and Tile Window to Right of Screen, then assign your preferred key combinations. Use the exact wording shown when you hover over the green button—macOS recognises those titles only.
Other Helpful Keyboard Shortcuts
- Control + Arrow Up: Open Mission Control
- Command + Tab: Switch between apps
- Command + Option + Esc: Force Quit
- F11 or Command + F3: Show Desktop
Troubleshooting
If Split View isn’t working as expected, try these fixes to resolve the issue and get back to productive multitasking.
Restart Your Mac
Restart your system, especially if Split View worked previously but suddenly stopped responding.
Check App Compatibility
Confirm the app supports Split View. Not all apps are compatible with this feature.
Adjust Display Settings
If windows overlap or appear stuck, go to System Settings > Displays > Resolution and adjust the display settings, which can affect Split View behavior.
Update macOS
Update to the latest macOS version to ensure you’re not encountering bugs that have already been patched in newer releases.
Managing Windows While in Split View
Once you enter Split View, macOS provides several tools to resize, reposition, and manage your windows effectively.
Resize the Divider
Click and drag the vertical bar between the two apps left or right to allocate more space to one side. Some apps have minimum width limits, so the divider may stop before reaching an exact 50/50 or 70/30 split.
Reveal Menu Bar and Window Controls
Move your cursor to the very top of the screen. The menu bar and window buttons (red, yellow, green) appear for whichever app is active.
Swap Left and Right Apps
Move your cursor to the top to reveal the title bar, then click and drag one app’s title bar across to the opposite side. The two apps swap positions.
Remove One App from Split View
Move your cursor to the top to reveal the window controls, then click the green button on the app you want to remove. Choose Move Window to Desktop to pull that app out of Split View and return it to your normal desktop. The remaining app exits Split View and returns to full screen on its own.
Replace One Side with a Different App
Open Mission Control (Control + Up Arrow or F3) while in Split View. Drag a different window onto one side of the Split View thumbnail at the top of the screen to swap it in without dismantling the entire setup.
Access the Dock
The Dock is hidden in Split View. Move your cursor to the bottom edge of the screen and pause briefly to reveal it.
Split Screen Without Full Screen Mode
Native Split View on Mac always creates a separate full-screen Space. If you want two windows visible side by side without entering full-screen mode, your approach depends on your macOS version.
On macOS Sequoia or Later
Use built-in window tiling:
- Hover over the green button on the first window and choose a half-screen layout (such as Tile Window to Left of Screen), or drag the window to the left or right edge of the screen until a highlight appears, then release.
- Click the second window when prompted to place it on the opposite side.
Both windows sit side by side on your normal desktop—no full-screen Space is created.
On macOS Ventura, Sonoma, or Earlier
Built-in Split View on these versions always takes over the full screen. The only native option for a non-full-screen side-by-side layout is to manually drag and resize two windows so they sit next to each other on your desktop. This works, but requires eyeballing the sizes each time.
For a more reliable experience on older macOS versions, a third-party tiling app is the practical solution. Rectangle (free) and Magnet (paid) both let you snap windows into halves, thirds, or quarters on your normal desktop with a keyboard shortcut or drag gesture—without entering full-screen mode.
What to Do if an App Doesn’t Support Split Screen
If you see the message “Not available in this Split View,” the app isn’t compatible. Try these potential fixes:
Enable Separate Spaces for Displays
Go to Apple menu > System Settings > Desktop & Dock > Mission Control and enable Displays have separate Spaces. After toggling this setting, sign out of your Mac and sign back in for the change to take effect. On older macOS releases, this setting may appear under System Preferences > Mission Control instead.
Try an Alternative App
Use a different app that supports Split View.
Update macOS
Update to the latest version of macOS to ensure compatibility.
Productivity Tips for Split Screen Mac
Split screen saves time and increases productivity. Here are practical ways to use it more effectively:
- Reduce constant switching between windows and tabs to keep your workflow moving smoothly.
- Work with key apps side by side, such as Google Docs and Safari or Notes and WordPress.
- Keep email or Slack open on one side so you can respond quickly without losing momentum.
- Skip the cost and desk space of a second monitor while still enjoying a dual-window setup.
- Use split screen for studying or school projects, especially when referencing sources as you write.
Working with Multiple Desktops in Split View
Spaces lets you create up to 16 virtual desktops to organize your workflow better. You can use Split View in each desktop. Here’s how:
- Open Mission Control.
- Go to the Spaces bar and select the Add button.
- Click the thumbnail for the space you want to access.
To stay organized, create a unique wallpaper for each space by changing the desktop picture in each one.
Connecting to a Second Monitor
Using an external display lets you view apps side-by-side across two screens—similar to Split View but without the full-screen limitation.
Step 1: Connect the Monitor
Connect the external display to your Mac using a compatible cable or adapter.
Step 2: Turn On Both Devices
Power on your Mac and the external monitor.
Step 3: Manage Display Settings
If the display doesn’t auto-arrange, go to System Settings > Displays to manage resolution, arrangement, and mirroring or extend options.
Step 4: Configure Multi-Monitor Behavior
Check System Settings > Desktop & Dock (Mission Control section) for Displays have separate Spaces. Toggle this setting on to give each display its own spaces and menu bar. You may need to log out and in again after changing this setting.
How to Exit Split Screen on Mac
When you finish using Split View, follow these steps to exit split screen on Mac:
Step 1: Reveal the Window Buttons
Move the pointer to the top of the screen to reveal the window buttons.
Step 2: Click the Green Button
Click the green button on either window to exit Split View. You can also click the red button to close that window.
Step 3: Use Move Window to Desktop
Hover the green button and choose Move Window to Desktop to pull it out of Split View.
Step 4: Manage Multiple Spaces
If you created multiple desktops or spaces, manage them in Mission Control (Control + ↑ or F3). Drag to rearrange, or hover thumbnails to add or remove spaces.
Force Quitting in Emergencies
If an app freezes while in Split View, you can force quit safely without affecting your other work.
Step 1: Use the Force Quit Shortcut
Press Option + Command + Esc.
Step 2: Select the App
In the Force Quit window, select the frozen app and click Force Quit.
Step 3: Alternative Method
Go to the Apple menu (top-left) > Force Quit.
Third-Party Alternatives to Split Screen on Mac
Built-in split screen tools are powerful, but third-party apps provide more flexibility by adding grid layouts, custom snap zones, and per-app rules. Here are some recommended options:
Split Screen
This app makes 50/50 layouts and quick resizes simple, with configurable shortcuts. Note that it offers no dual-monitor-specific layouts.
Rectangle App
Popular and powerful window management with snapping, custom shortcuts, and fine-grained control. Check the latest version for free versus Pro features.
Magnet
Great for halves, thirds, quarters, and vertical displays with precise snapping controls if that is central to your needs.
Conclusion
Learning how to split screen on Mac is a straightforward way to boost your productivity and eliminate constant window switching. Whether you use the built-in Split View, keyboard shortcuts via Mission Control, or third-party tiling apps, you can resolve the frustration of juggling multiple windows and get back to focused work. Try the steps above, customize shortcuts to fit your workflow, and enjoy a more organized desktop that keeps everything you need visible at once.
Frequently asked questions
How do I split screen on Mac using the keyboard?
Open Mission Control by pressing Control + Up Arrow or F3. Drag the first window to the top Spaces bar to create a full-screen space, then drag a second window onto that thumbnail to pair them in Split View. Click the Split View thumbnail to open it. You can also create custom keyboard shortcuts for Tile Window to Left of Screen and Tile Window to Right of Screen in System Settings > Keyboard > Keyboard Shortcuts > App Shortcuts.
Why can’t I split screen on my Mac?
Check that your Mac runs OS X El Capitan (10.11) or later and that the app supports Split View. Restart your Mac if the feature worked previously but stopped. Go to System Settings > Desktop & Dock > Mission Control and enable Displays have separate Spaces, then sign out and back in. If the issue persists, update macOS or try a different app.
Can I split screen on Mac without going full screen?
On macOS Sequoia or later, hover over the green button and choose a half-screen layout, or drag a window to the left or right edge until a highlight appears. Both windows will sit side by side on your normal desktop without entering full-screen mode. On macOS Ventura, Sonoma, or earlier, manually resize two windows or use a third-party app like Rectangle or Magnet to snap windows without full screen.
How do I exit split screen on Mac?
Move your pointer to the top of the screen to reveal the window buttons. Click the green button on either window to exit Split View, or click the red button to close that window. You can also hover the green button and choose Move Window to Desktop to pull one app out of Split View and return it to your normal desktop.
What apps don’t support split screen on Mac?
Not all apps are compatible with Split View. If you see the message “Not available in this Split View,” the app doesn’t support the feature. Try an alternative app that does support Split View, enable Displays have separate Spaces in System Settings > Desktop & Dock > Mission Control, or update to the latest version of macOS.
How do I resize windows in split screen on Mac?
Click and drag the vertical divider bar between the two apps left or right to allocate more space to one side. Some apps have minimum width limits, so the divider may stop before reaching an exact split. Move your cursor to the top to reveal window controls, or swap apps by dragging the title bar across to the opposite side.
Leave a Reply