
Apple launched iMessages feature in the year 2012. It is a dedicated messaging app for iOS devices by replacing iChat. When it comes to messaging, we have seen drastic development in texting apps over the years. Apps like WhatsApp, Telegram, Threema and much more are started making more attractive and feature rich.
Texting is more fun filled with stickers, emos, and emoji support. Thanks to some iMessaging apps which offer all the features required for serious texters.
iMessages Apps Requirements
iMessages Apps works only with iPhone or iPad running iOS 10 or higher with an active internet connection and an Apple ID for downloading apps.
Supported iMessage Apps
The iMessages Apps are available in the Apple App Store. You can browse the type of iMessages Apps according to the category in the store. Mostly they are sticker packages, animations, and other interesting features. These type of apps offers exciting features to make your texting more enjoyable.
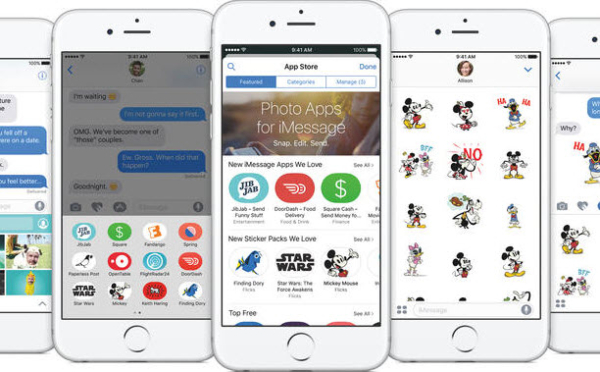
Supporting iMessges apps includes categories like Entertainment, Food, and Drink, Games, Lifestyle, Photo and Video, Productivity, Shopping, Social Networking, Stickers, and Travel.
Few app has direct connecting support with iMessages like Evernote and Open Table. You can use these apps inputs to send text messages to iPhone and Android devices as well.
How To Get iMessages Apps for iPhone
To get iMessages Apps for iPhone follow the below steps.
- Open the iMessage App.
- Start a new conversation or tap on an existing conversation.
- Here tap on the App Store, which is looks like an “A” next to the iMessage at the bottom.
- Now tap on the Four dot icon at the bottom.
- Now tap on the Store icon.
- The App store is divided into Featured, Categories, Manage; here you can browse your desired apps to integrate.
- Now tap on the install or Purchase option.
How To Use iMessage Apps for iPhone
After installing iMessages Apps now, it is the time to start using it.
- To start using iMessaging Apps start a new conversation or existing conversation.
- Now tap on “A” icon placed at the bottom.
- Here you can access recently installed iMessages apps by swiping left and right.
- These apps also work like bots (Telegram Bots for example) to easily share content to your conversations.
How To Remove iMessages Apps
If you feel any installed iMessaging App uninterested or not useful you can uninstall to save space.
To remove an app go to Messages in that tap on the “A” icon and tap on the store. Here you will see Manage tab; now you can enable or hide the specific app from the list of installed iMessages apps on your device.
Conclusion
That’s it, now you can install and enjoy the iMessages apps on your device. The App Store is showing continuous development and many more attractive features are adding regularly. Take your hands on theses apps and make your chatting more meaningful. If you ever feel any one app useless you can easily hide from the functionality. Please do share your views and comments below.
Leave a Reply