
No Internet, Secured is a most common error when you try to connect Windows 10 machine with an active Internet connection. It is a strange error by Windows OS and it shows No Internet even after when you connected to an Internet connection.
Why No Internet Secured error occurs?
In many types of Windows 10 errors, we have observed a strong reason behind it. Windows 10 OS download and updates its latest updates automatically by default. However, there are times when some problematic updates cause this error.
Fret not, we have you covered if you are facing this weird issue of “No Internet Secured” error. Of course, we can’t be too sure of a single solution as to why it is happening on your system. So, we will give you multiple options to troubleshoot which should perfectly solve your problem.
Fix a Windows 10 “No Internet, secured” Connection Error
Method 1: Disabling IPv6
- Open Network and Sharing centre by clicking on the network icon at the context menu.
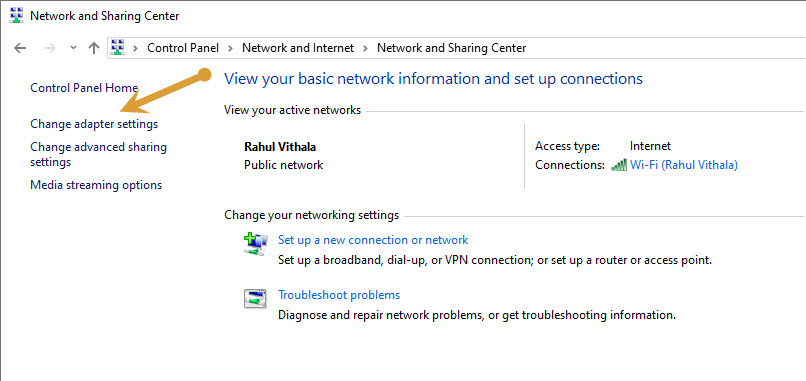
- Now, select the change adapter settings option when the Network and Sharing Center window.

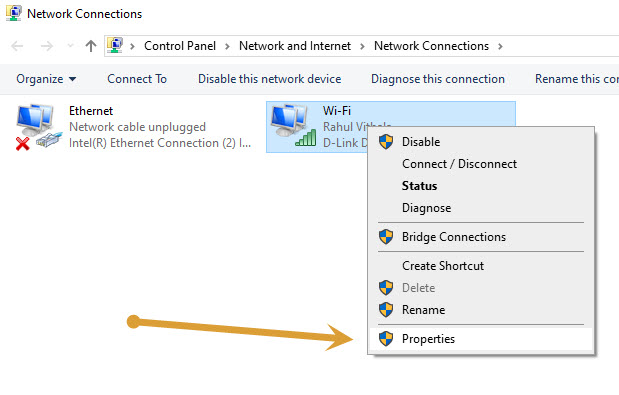
- Here, locate the network adapter you are currently using and right-click to open properties.

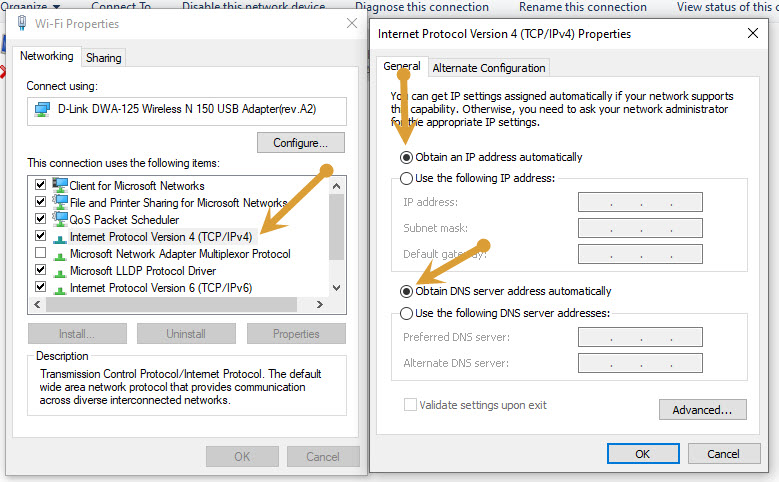
- Now, select the Internet Protocol Version 6 (TCP/IPv6) on the list of items and disable IPv6.
- After saving, now restart your computer.

Method 2: Modifying the TCP/IP Properties
- Open run box by clicking Windows+R on your keyboard.
- Here, type “ncpa.cpl” and click OK in the run box.
- In the Network Connections, click on the Wifi connection you are using and right-click on it to open properties.
- Now, double click on the Internet protocol 4 or TCP/IPv4

- Here, choose “obtain an IP address automatically” and “obtain DNS server automatically” options.
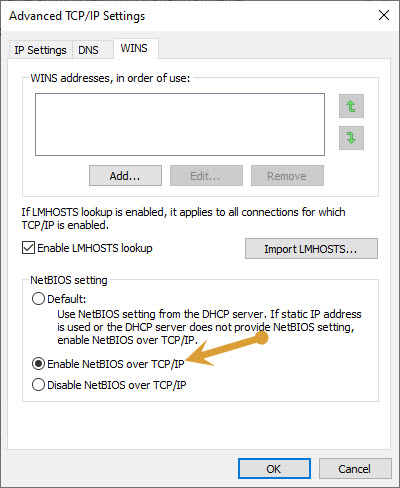
- Now, click on the “advanced” button and head to “WINS” tab.

- Here, scroll down to NetBIOS setting and choose “enable NetBIOS over TCP/IP” setting.
- Now, save all the settings and restart your computer.
These are the best fixes to solve, No Internet secured error on Windows 10.
Leave a Reply