We already discussed and fixed the issue of Windows 10 1809 Deleting User Files on Update error. The Windows 10 1809 update is caused many errors after the update, one of the most irritating is mouse not working error.
Before going to start the fixing procedure, make sure to check the mouse on other PC. If the problem is with the mouse itself, you can skip the below procedure.
1. Update Mouse Drivers
1. Open Device Manager by right-clicking on This PC icon on the desktop. Or alternatively, you can launch by executing devmgmt.msc command on run.
2. In the Device Manager, expand the options for Mice and other pointing devices.
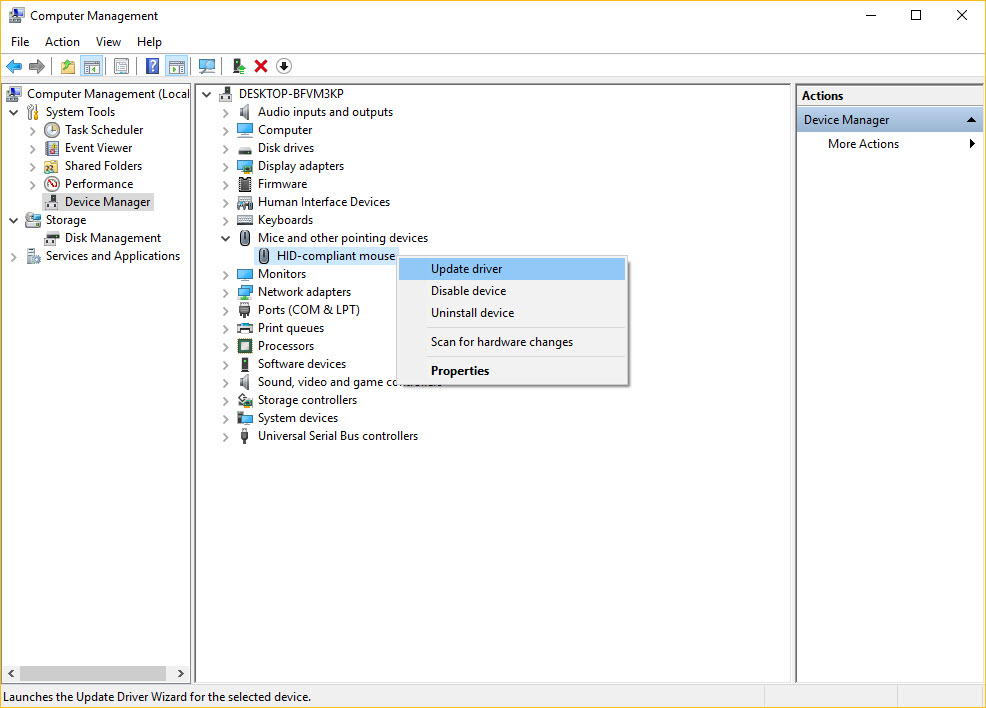
3. Now right click on the mouse drivers and click on Update driver.
Once you have done the updating, now restart the system.
After restarting check the mouse is working or not. If still, it is not working try the second procedure.
2. Disable USB Selective Suspend Setting
1. Open Power Options settings by executing power cfg.cpl command in the run.
2. Now click on the Change Plan settings.
3. Here, select on the Change advanced power settings.
4. It will show a list of advanced settings, here expand the USB Settings and then expand the USB selective suspend setting.
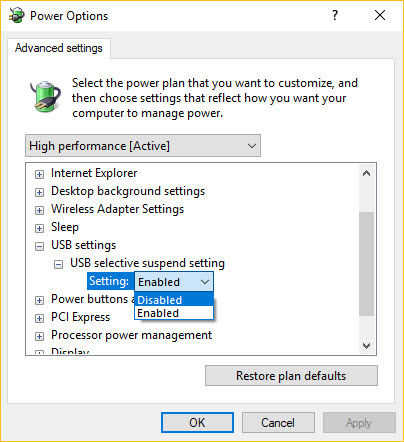
5. Here, change the values to Disabled for both Plugged in and Batter modes.
6. Now click on apply and then Ok to save the settings.
3. SFC Scan
An SFC Scan option is a very simple and easy way to replace the system files which gone missing due to a bad update.
1. open the command prompt and enter following command and execute it.
DISM.exe /Online /Cleanup-image /Restorehealth2. After executing the command, it will take some time to process.
3. Now type the following command and click on enter.
sfc /scannow4. Once both the commands, executed now restart the system.
4. System Restore
If none of the above procedures not worked and if your mouse is still not working, a system restore will help you in getting the working condition back.
I hope any one of the above methods are worked and you got your mouse working back. Please feel free to share your views in the comment box below.
Leave a Reply