

How to Fix an External Hard Drive or SSD Not Showing Up on Windows 11 or Mac
External drive not detected on Windows 11 or your Mac? Here’s how I work through it, from cables and Disk Management to Disk Utility First Aid, and when to stop and call a data recovery service.

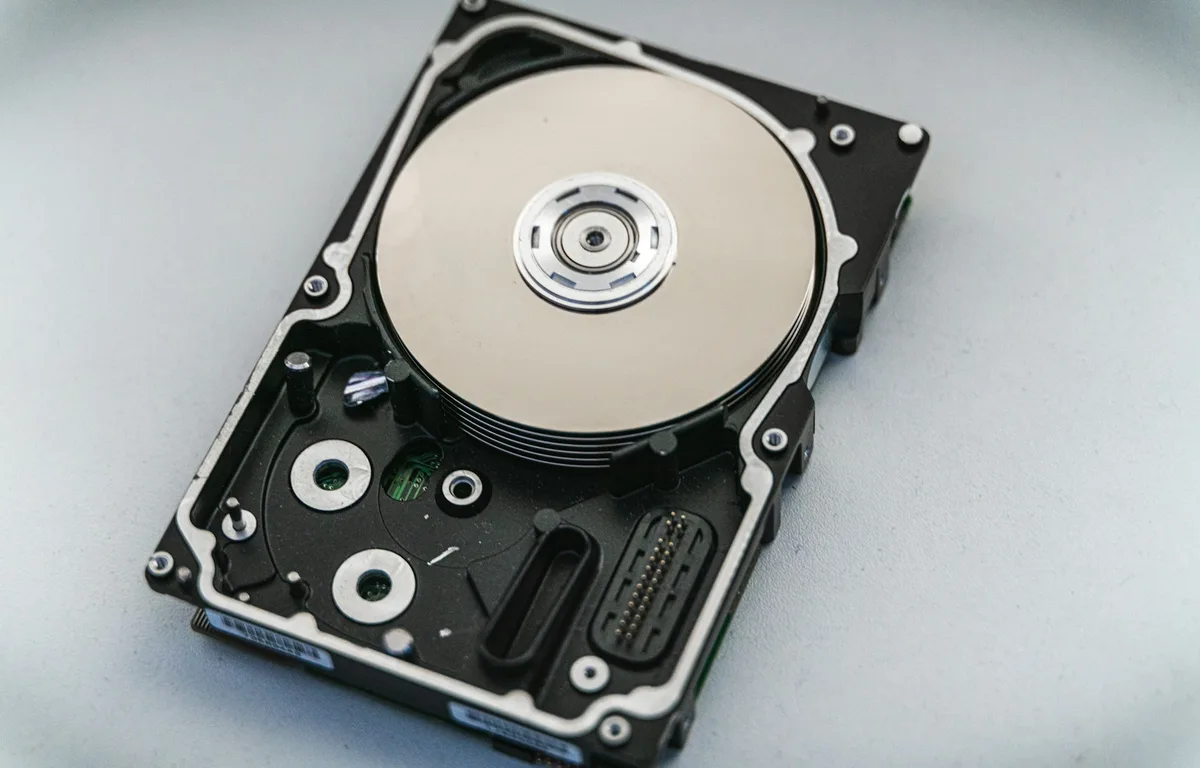
Photo by Nick on Unsplash
You plug in your external hard drive or SSD, wait for the usual pop-up, and nothing happens. It’s not in File Explorer. It’s not in Finder. And because your files are sitting on that drive, your stomach drops a little.
The good news is that an external drive not detected by your computer is usually a boring problem with a boring fix. A loose cable, a missing drive letter, or a Finder setting is behind it far more often than a dead drive.
I’ve written this guide for Windows 11 (Microsoft lists version 26H2 as the current release) and macOS 27. I’ve ordered the steps the way I’d work through them myself, with the safe checks first and the risky ones last. A couple of steps can wipe a drive, and I’ll flag those clearly so you don’t lose anything by accident.
Quick answer: Start with the cable, port and power, and try the drive on another computer. On Windows 11, open Disk Management to see whether the drive is there but offline, not initialized or missing a drive letter. On a Mac, open Disk Utility, choose View > Show All Devices, mount the drive and run First Aid. If the drive clicks, grinds or beeps, stop using it and contact a data recovery service instead.
Start with the cable, port and power
I know, it sounds too obvious. But this is where a lot of “dead” drives come back to life.
Unplug the drive and plug it straight into your computer, not through a hub, dock or front-panel port. Try a different USB port. If you have a spare cable that fits, swap it in, because cables fail more often than people expect. If your drive is the bigger desktop type with its own power adapter, make sure that adapter is plugged in and switched on.
Apple’s own advice for a drive that won’t appear is to check its cable, connections and power, so this isn’t just me being fussy.
Try it on another computer
This one step tells you a lot. If the drive shows up fine on a friend’s laptop or your work PC, the drive is probably OK and the problem is on your computer (a setting, a driver or a port). If it doesn’t show up anywhere, the drive itself is the more likely suspect.
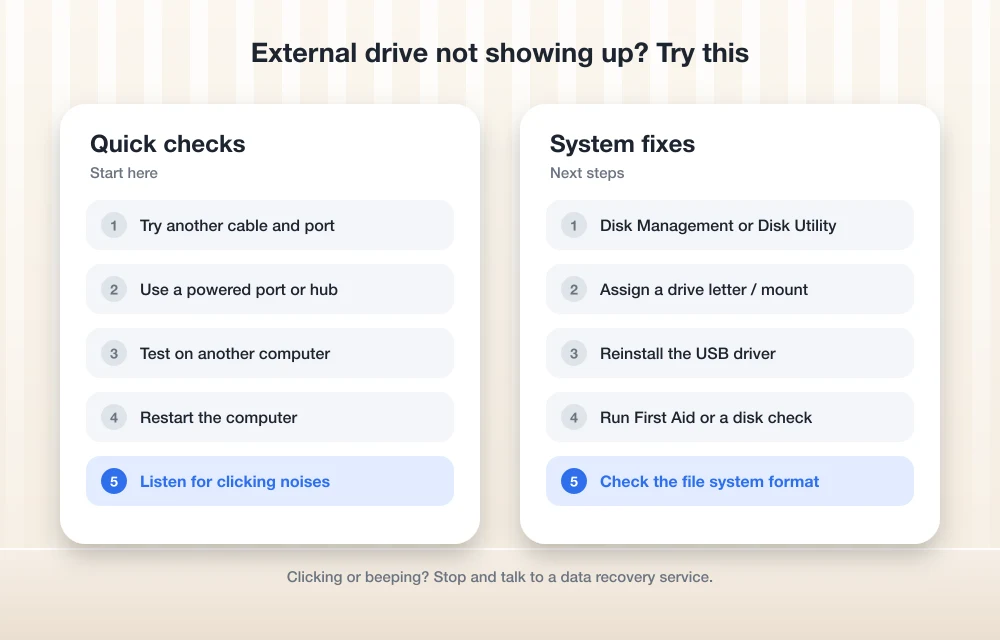
Listen to the drive before you do anything else
Put your ear near the drive for a few seconds. This matters more than any software step in this guide.
On a traditional spinning hard drive, repeated clicking, grinding or beeping usually points to a mechanical fault. I couldn’t find an official Microsoft or Apple page on these sounds, so treat this as general advice, but it’s advice I’d follow every time: stop powering the drive. Don’t run repair tools on it, don’t initialize it and don’t keep plugging it in to “see if it works now.” Every spin-up can make things worse.
SSDs have no moving parts, so they won’t click. If an SSD is silent and invisible on every computer you try, the software steps below are still worth a go.
How to fix an external drive not detected on Windows 11
Check Disk Management first
Disk Management is the built-in Windows tool for drives. Microsoft describes it as the place to initialize new drives, create and format volumes, change drive letters, and extend or shrink existing volumes. A volume, by the way, is just a usable section of a drive, the thing that shows up with a letter like E: or F:. Microsoft’s Disk Management in Windows guide covers the tool in more detail.
- Right-click the Start button (or long-press it on a touchscreen) and select Disk Management. You can also type Disk Management in search and select Create and format hard disk partitions.
- Find your external drive in the lower half of the window. Matching it by size is the easiest way.
- Look at the status shown next to the disk and its volume, then use the table below.
| What you see | What it likely means | What to do |
|---|---|---|
| Offline | Windows sees the disk but isn’t using it | Right-click the disk and select Online |
| Volume with no drive letter | The drive is fine but File Explorer has nothing to show | Assign a drive letter (steps below) |
| Not Initialized | The disk might not have a valid disk signature | Only initialize if it’s a new, empty drive |
| Not listed at all | Connection, driver or hardware problem | Try Device Manager, then another computer |
Assign a drive letter
This is the fix I’d bet on if the drive shows up in Disk Management looking healthy but never appears in File Explorer.
- In Disk Management, right-click the volume on your external drive and select Change Drive Letter and Paths.
- Click Change if it already has a letter, or Add if it doesn’t.
- Choose Assign the following drive letter, pick a free letter and click OK.
One warning from Microsoft: if you change the letter of a drive that contains Windows or apps, those apps might have trouble running or finding the drive. For a plain external backup drive this rarely matters, but don’t touch your C: drive.
Bring an offline disk online
If the disk says Offline, right-click it and select Online. If it won’t stay online, Microsoft’s advice is to check the cables and disk controller and make sure the physical disk is healthy. In other words, go back to the cable checks and the listening test.
Be careful with Initialize Disk
This is the step that catches people out. When a drive shows as Not Initialized, Windows offers to initialize it, and clicking yes feels like the fix.
Microsoft’s initialize instructions are written for a new disk that has no existing data. If you’ve just bought the drive and it’s empty, go ahead: right-click the disk and select Initialize Disk. Microsoft also notes that some USB disks can’t be initialized at all; they’re just formatted and then given a drive letter.
But if this drive had your files on it yesterday and suddenly says Not Initialized, stop. Don’t initialize it and don’t format it. That’s a sign something went wrong with the drive, and it’s time to think about recovery, not setup.
Reinstall the driver in Device Manager
If the drive doesn’t appear in Disk Management at all, a confused driver could be the reason. Menu names here can shift a little between Windows updates, but the process looks like this:
- Right-click the Start button and select Device Manager.
- Expand Disk drives or Universal Serial Bus controllers and find your external drive.
- Right-click it and choose Uninstall device.
- Unplug the drive, then either restart your PC or go to Action > Scan for hardware changes and plug the drive back in.
Windows should reinstall the driver on its own when it sees the drive again.
Turn off USB selective suspend
USB selective suspend is a power-saving feature that lets Windows put USB devices to sleep. Sometimes that can make an external drive drop out or not wake up properly. To turn it off:
- Open Control Panel and go to Power Options.
- Click Change plan settings next to your current plan, then Change advanced power settings.
- Expand USB settings, then USB selective suspend setting, and set it to Disabled.
Heads up: on some PCs, especially laptops that use Modern Standby (a newer kind of sleep mode), this option may be hidden. If you can’t find it, skip this step and move on.
How to fix an external drive not showing up on a Mac
Check your Finder settings
Before you assume the worst, make sure your Mac is set to actually show external drives. It’s surprisingly easy to have this switched off.
- For the desktop: open Finder > Settings > General and tick External disks under “Show these items on the desktop.”
- For the sidebar: open Finder > Settings > Sidebar and tick External disks under Locations.
Find and mount the drive in Disk Utility
Open Disk Utility by clicking the Apps icon in the Dock and typing Disk Utility in the search field. It has traditionally lived in Applications > Utilities too.
Next, choose View > Show All Devices from the menu bar or toolbar. This shows the physical drive and everything on it, not just the volumes. If your drive’s volume appears greyed out in the sidebar, it isn’t mounted (connected for use). Select it and click Mount in the toolbar. If it mounts, it should pop up in Finder right away.
Run First Aid in the right order
First Aid checks for and fixes errors in the drive’s formatting and directory structure, which is basically the map your Mac uses to find files. Apple’s guide to repairing a storage device with Disk Utility has the full walkthrough, and it starts by telling you to make sure you have a current backup of your data.
The order matters. Apple says to run First Aid on each volume on the drive first, then on each container, and finally on the storage device itself. Select an item in the sidebar, click First Aid in the toolbar and follow the prompts, then move down the list.
Be realistic about what it can do. Apple says Disk Utility can’t detect or repair every problem a disk may have. If it tells you the disk is about to fail, Apple’s advice is to back up your data and replace the disk, because you can’t repair it. If First Aid finds errors it can’t fix, Apple suggests erasing (formatting) the drive. That wipes everything, so only do it once your files are safe somewhere else.
If the drive isn’t in the Disk Utility sidebar at all
Apple’s guidance here is to shut down your Mac, unplug every nonessential device, and try again with just the external drive connected. Check its cable, connections and power one more time. If it still doesn’t appear, either the Mac or the drive might need service.
The drive shows up but won’t work: file system mix-ups
Sometimes the drive is perfectly healthy and the problem is its format. A drive formatted on a Mac can look empty or broken on Windows, and the reverse happens too. Here’s how the common formats behave without extra software:
| Format | On Windows 11 | On a Mac |
|---|---|---|
| NTFS | Read and write | Read only (writing needs third-party software) |
| APFS or Mac OS Extended (HFS+) | Can’t read natively | Read and write |
| exFAT | Read and write | Read and write |
If you move a drive between a PC and a Mac a lot, exFAT is the usual choice. Just remember that reformatting a drive erases it, so copy your files off first using the computer that can read it.
This comes up a lot when people use an external drive as a dumping ground for phone files. If you’re shifting photos from an Android phone, my guide on backing up Android photos to a Windows PC with Quick Share pairs well with an exFAT drive. And if your iPhone keeps nagging you about storage, it’s worth reading what low disk space means on iPhone before you start offloading.
When to stop and use a data recovery service
Here’s my honest rule: if the files on that drive matter and the drive is acting physically wrong, stop troubleshooting and get professional help.
That means calling a data recovery service if the drive clicks, grinds or beeps, if it doesn’t show up on any computer after the cable checks, or if Windows or macOS is pushing you to initialize or erase a drive that has data you need. DIY tools and repeated retries can turn a recoverable drive into an unrecoverable one.
Professional recovery isn’t cheap, and costs vary a lot depending on the damage, so get a quote first and ask what happens if they can’t get your files back. If the files are replaceable, you can skip all that and just buy a new drive.
How to avoid this next time
The best fix for a failing drive is not needing it. Keep at least one other copy of anything important, ideally somewhere other than a single external drive. If you run a small business, my guide on how to back up business data walks through a more serious setup.
The other habit is ejecting properly. Pulling a drive out while it’s still writing is a classic way to corrupt it.
- On Windows: click the Safely Remove Hardware and Eject Media icon in the taskbar, or right-click the drive in File Explorer and choose Eject.
- On a Mac: click the Eject icon next to the drive in the Finder sidebar, or drag the drive to the Trash.
Wait until your computer says it’s safe before unplugging.
Replacement drives worth a look on Amazon
If your old drive is clicking or keeps disappearing, I wouldn’t trust it with anything important again. These are solid replacements. Check the current price on Amazon and make sure the listing matches the exact model.
- Samsung T7 Portable SSD (2TB): small, fast USB-C SSD that works on both Windows and Mac.
- SanDisk Extreme Portable SSD (2TB, new model): a rugged pick if the drive lives in a bag.
- WD My Passport (5TB): a classic hard drive with lots of room for backups.
As an Amazon Associate, thetechhacker earns from qualifying purchases.
Frequently Asked Questions
Why does my external drive show in Disk Management but not in File Explorer?
The most common reason is that the volume has no drive letter. Right-click it in Disk Management, select Change Drive Letter and Paths, then add a letter. It could also be offline, or formatted as APFS or HFS+ from a Mac, which Windows can’t read natively.
Will initializing an external drive delete my files?
Treat it as if it will. Microsoft’s initialize instructions are meant for new disks with no existing data. If a drive that had files on it suddenly says Not Initialized, don’t initialize or format it; consider data recovery instead.
What format should I use for an external drive on both Windows and Mac?
exFAT works for reading and writing on both Windows 11 and macOS. A Mac can read NTFS drives but can’t write to them without third-party software, and Windows can’t read APFS or HFS+ natively. Reformatting erases the drive, so copy your files off first.
Can Disk Utility First Aid fix any external drive problem?
No. Apple says First Aid fixes errors in a drive’s formatting and directory structure, but it can’t detect or repair every problem. If it says the disk is about to fail, back up your data and replace the drive.
What should I do if my external hard drive is clicking?
Stop using it. Repeated clicking, grinding or beeping usually points to a mechanical fault, and running repair tools or plugging it in repeatedly can make things worse. If the data matters, contact a professional data recovery service.
Final Thoughts
Most of the time, an external drive that won’t show up just needs a better cable, a drive letter in Disk Management or a quick mount in Disk Utility. Work through the safe steps first, and treat Initialize and Erase as last resorts only for drives with nothing you need.
And if your drive starts clicking, trust that sound. Unplug it, leave it alone and let a professional decide what’s possible. Then set up a backup so you never have to feel that stomach drop again.
Featured image: Nick on Unsplash.
You might also like
How to Do Defragmentation in Windows 10
Defragmenting your hard drive will make it faster by optimizing the sectors and by applying similar fixes if there are some fragmented sectors. So it is recommended to do defragmentation every once in a while in order to make sure that your hard drive performs at its best. In this article, we are going to…
How to Wipe a Hard Drive Completely
In this day and age, everyone must be using a Windows or macOS powered laptop or desktop. If you use either of these, you are bound to be using hard drives. In some cases, SSDs are used in Laptops or PCs but generally, people use hard drives. This is because they are much cheaper than…

Simple Ways To Fix Webcam Is Not Working Issue
Simple Ways To Fix Webcam Is Not Working Issue: It is a common fact that we get errors and connection problems when you are trying to connect an external hardware component to our PC. These errors are most common in Windows than the macOS. If your webcam is not working, it could be due to…
The week in tech, minus the noise.
New reviews, fixes and the stories that matter — once a week, straight to your inbox.
We only use your email to send the newsletter. Unsubscribe any time. See our privacy policy.
Comments